Outlook Add-in
Outlook Add-in installation
The Download URI for the Outlook Add-in can be found in the URI list on the VQCM-Admin Welcome page:

NOTE: if you are using an untrusted, temporary certificate, you will have to accept the non-trusted certificate.
Select “File>Save As” from the browser menu and save the outlook.xml file.
From Outlook 2016/Office365, Menu>File>Manage Add-ins

This will open Outlook Web Access in your web browser on the ‘Manage add-ins’ page.
Authenticate with your Exchange Account
Manage Add-ins:
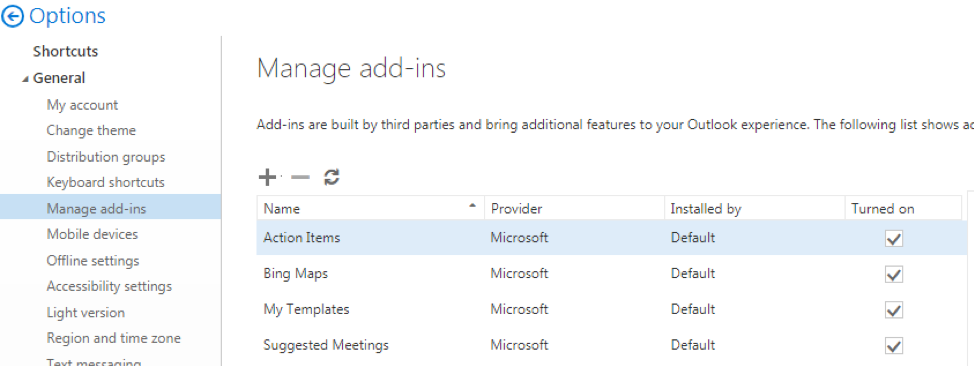
Click + and select “Add from File”:
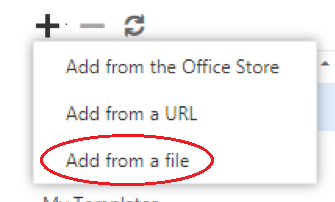
Select the file:
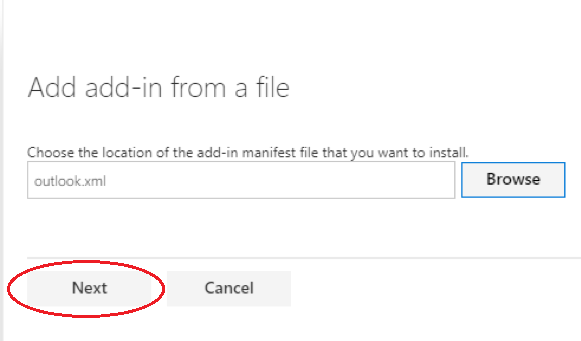
Click “Next”
Read the caution and if OK, click "Install":
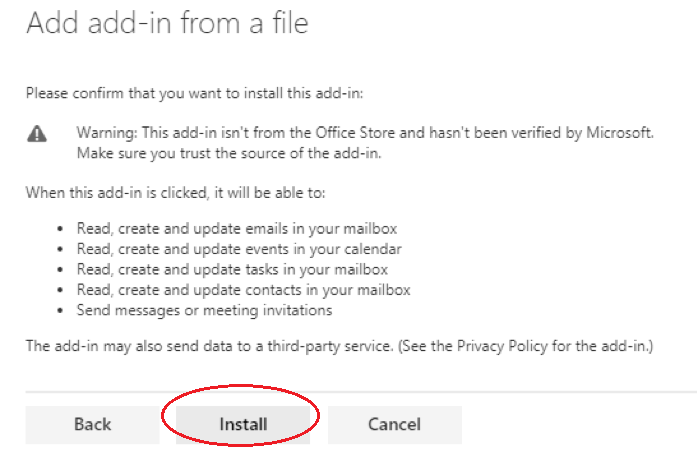
You're done:
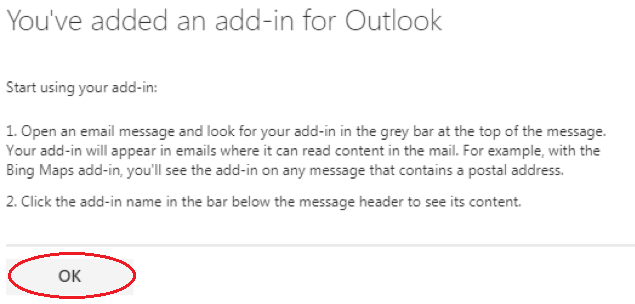
Click OK. Exit and re-load Outlook.
You should then see the VQCM logon in Outlook’s menu:

NOTE: The Add-in icon only appears if you are looking at mails in your inbox (and the mail content can be read – see the note provided by Microsoft at the final stage of installing the Add-in). If, for example, you don’t have your inbox selected, you will see a greyed-out icon:

Getting started
Once the Outlook Add-in has been installed, you will see the Conference Manager button appear in Outlook’s menu:

Note that you need to have selected the inbox otherwise you’ll see no button or it will appeared greyed out. This example shows it greyed because the inbox has not been opened:

Clicking on the Conference Manager button results in:
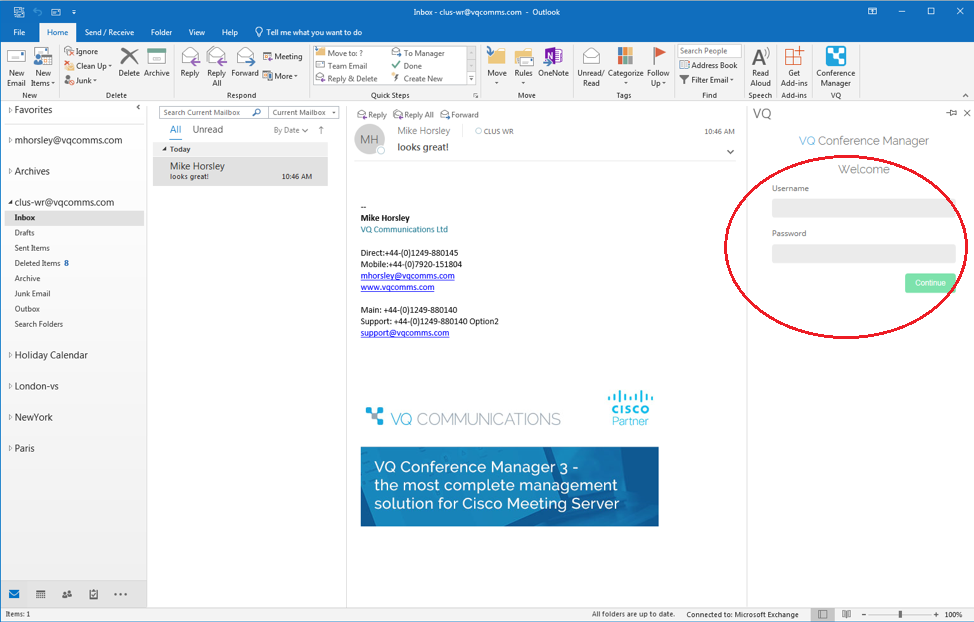
Sign in:
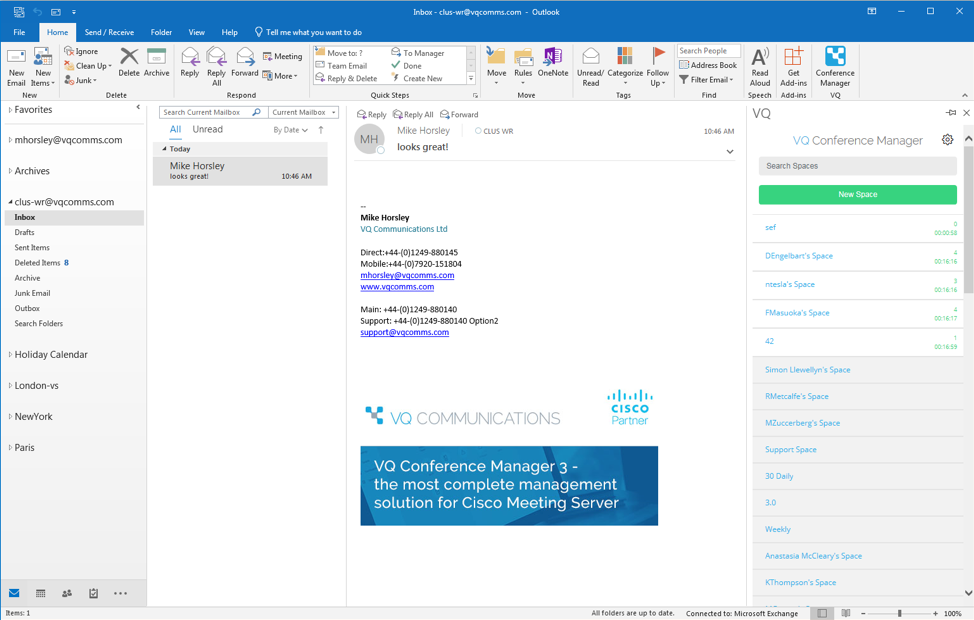
For normal Users, the Add-in panel shows all Spaces that the user owns or is a member of. Operator users will see all Spaces as defined by their Access Control Level. The functionality available to Users and Operators is the same; the Add-in is designed to provide simple, end-user friendly, functionality. Operators might find using it useful but they are not the intended user group for it.
The default view for the Add-in is the Activity page; this shows Active Spaces (white background) and non-Active Spaces (grey background).
Active Spaces show the Space name, the count of how many participants are currently in the call and how long the call has been active:
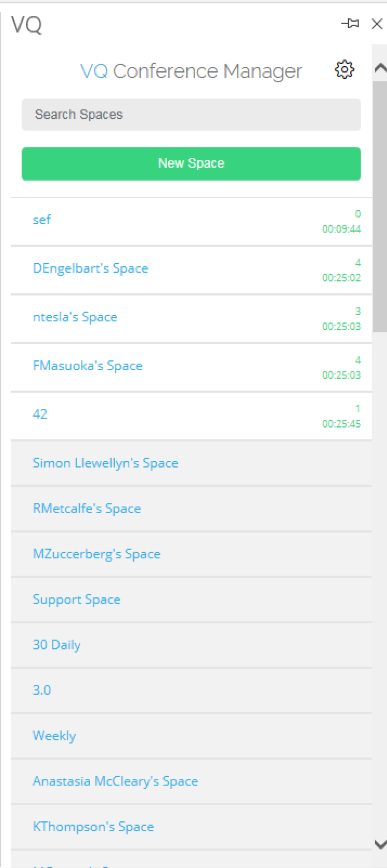
Drilling down into an active Space shows the Participants:
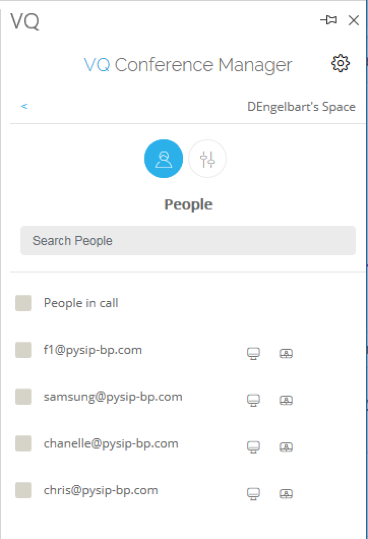
Hover over the Participants to perform an active – mutes, layout changes or disconnecting the Participant.

Select “People in call” if you want to perform the action on multiple Participants.
Click on the Settings icon to change the Space settings.
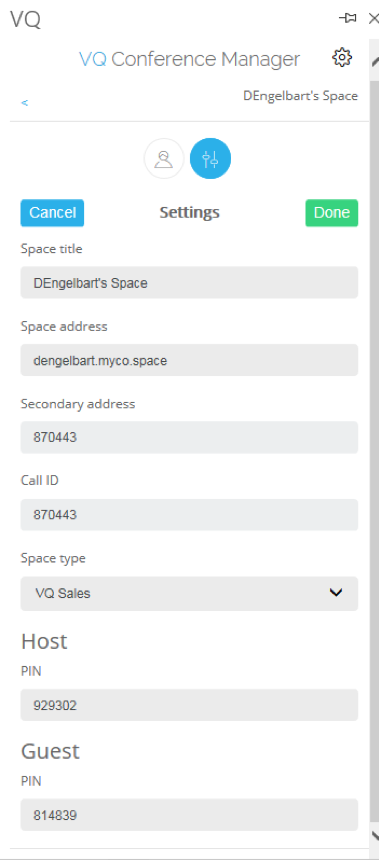
Click Done to save any changes.
Adding “How to join my Space” details to emails or calendar Appointments
The Add-In allows details about Spaces to be “injected” into emails or appointments. The content of the injected HTML is defined on the VQ Conference Manager (VQCM) Server and can be customized to meet the specific needs of each customer.
The recipients of the email or meeting invite are therefore provided all the details to join the call; this makes it easier for them and helps drive adoption.
Please note that the Add-In user interface only allows Space Details to be injected when an email or meeting invite is open.
Adding Space Details to an Email
Open an existing email or create a new one. Click on the Conference Manager icon if required to make the Add-In panel visible. Note how green arrows are now visible in the Add-In panel; click on the green arrow corresponding to the Space you want to use.
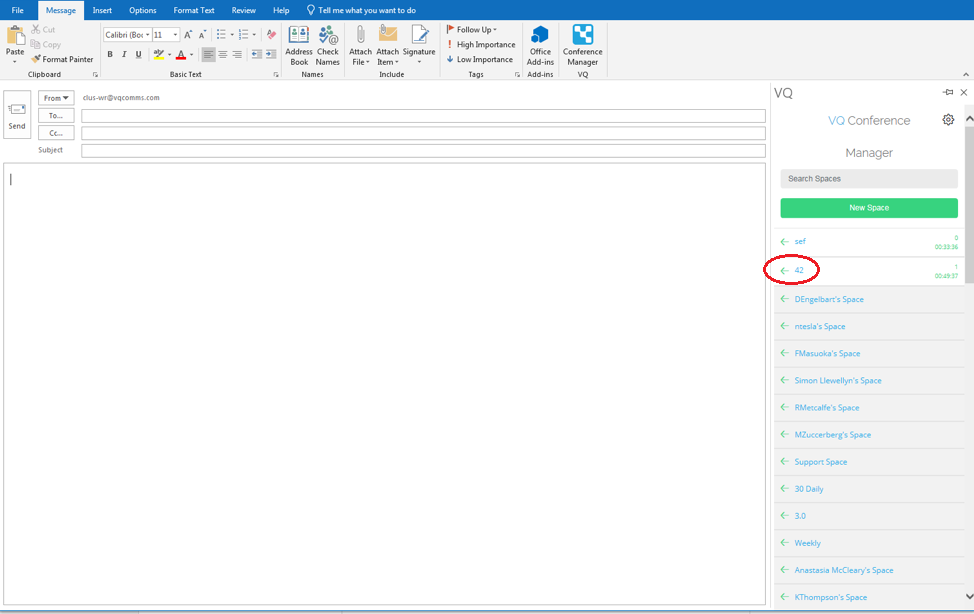
Clicking on the green arrow next to 42 results in:
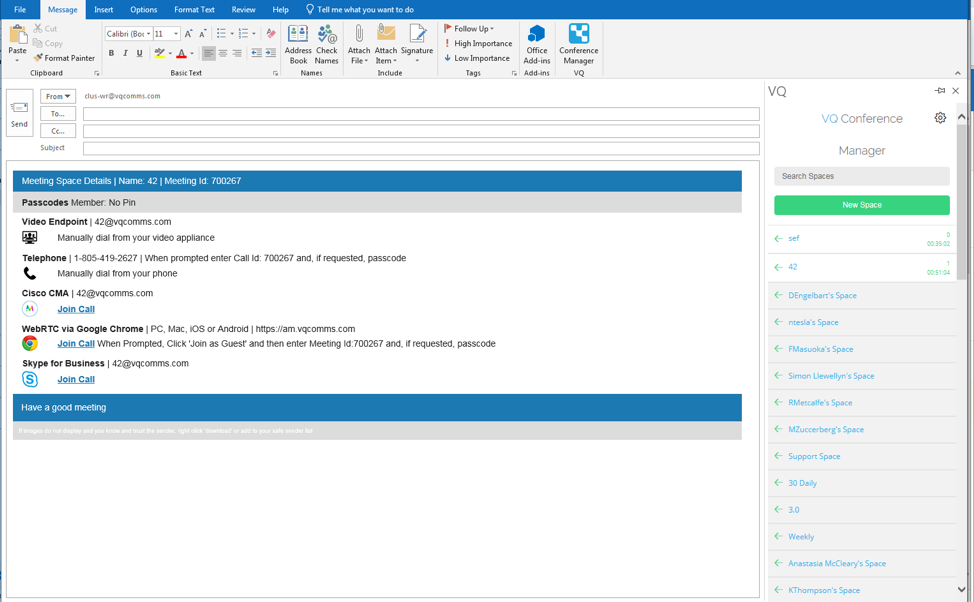
Adding Space Details to an Appointment
The process is the same as with an Email; open an Appointment (new or existing) and click on the green arrow for the Space you want to use:
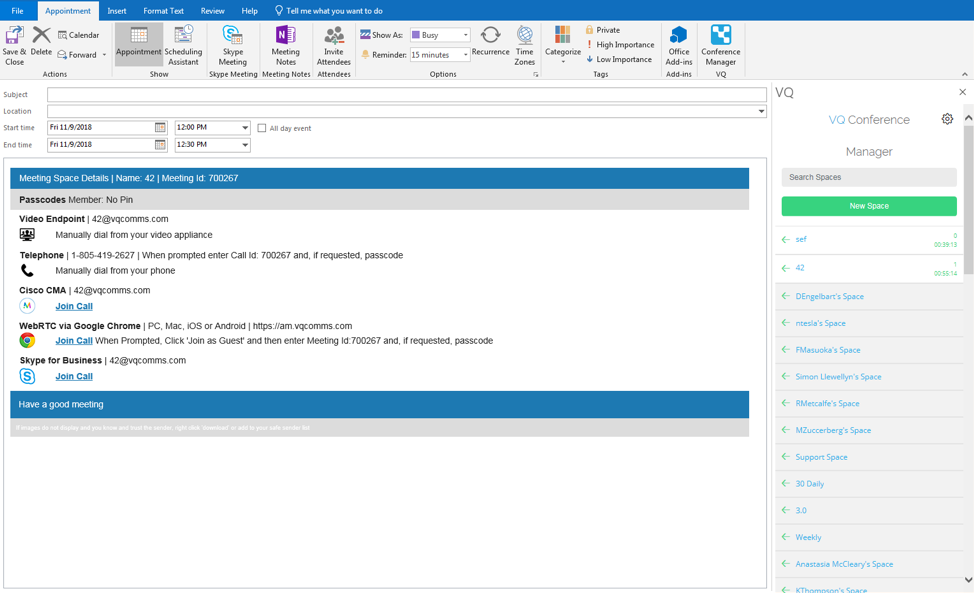
Space passcodes
Please be aware that when you inject Space details into a meeting or email, you are accessing the Space details at the point in time when you click the green inject arrow.
If the passcode on the Space is changed sometime later, the passcode will then differ from the details originally sent to the Participants and their attempts to join the meeting will fail.
So, if you need to generate a meeting specific passcode, remember to note the existing passcode, generate a new one, inject the new one and then restore the Space passcode to the original. As the time approaches for the meeting with the meeting specific passcode, remember to reverse the process and set the Space Passcode to the new ‘meeting specific passcode’ and, after the meeting, restore it to its original value.
Automating ‘one time’ or ‘meeting specific’ passcodes is a roadmap item we plan addressing in a future release.
Changing the text injected into Emails and Appointments
The text injected is defined by the script associated with the User Experience (“UX”) Profile associated with the User. As an Administrator, under System->UX Profiles, find the Profile of the User and from that, drill down into Alerts and find the Email Alert template associated with URI Reservation Details.
Controlling whether Add-in users can create new Spaces
As an Administrator, select the "UX Profile" for the Outlook Add-in users and use the "Settings" coApp to control whether users of this type can create, edit or delete Spaces.
Outlook Add-in and Internet Explorer 11 Compatibility mode
The Outlook Add-in requires IE 11 Compatibility mode to be off; trying to use the Add-in with Compatibility mode turned on results in a blank page being displayed. The page will look like this:

First check the version of Internet Explorer is 11. If not, upgrade to 11, otherwise continue.
Open a new browser (IE 11) session and navigate to https://yourVQCM/outlook.xml and check the console (press F12).
Depending on the your domain setup it’s possible it won’t show the compatibility mode warning, but errors will be visible:
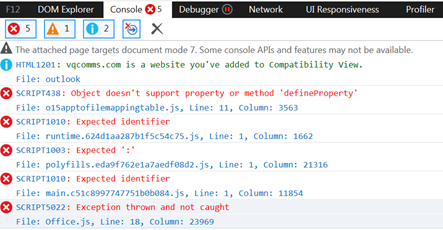
A correct load looks something like this:

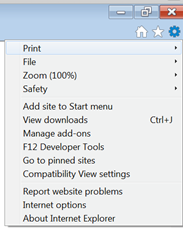
Check the Compatibility View settings from IE’s settings menu (see below):
Check for the domain in the list. You DO NOT want to see VQCM’s website listed below. In the following example, we’d added VQCM to test the Compatibility problem:
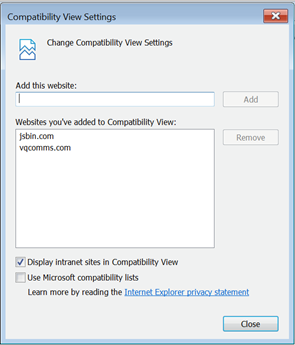
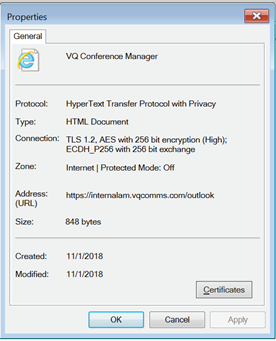
If “Display Intranet sites in Compatibility View” is checked, make sure that the site is not in the Intranet Zone by right clicking on the background of the page and selecting Properties. Under “Zone”, it should show “Internet”:
Outlook Add-in and External Identity Providers
If an external Identity Provider is being used (for example, Okta, OneLogin or Duo), the Outlook Add-in manifest must be manually edited to include a white-list entry for the Identity Provider.
From VQCM 3.2 this process has been automated.
Process:
- Before making changes the AppDomains section should look like this, with the URIs for VQCM and VQCM login servers:
- <AppDomains>
- <AppDomain>https://james2.vq.k8s/</AppDomain>
- <AppDomain>https://login.james2.vq.k8s/</AppDomain>
- </AppDomains>
- Add a third <AppDomain> element containing the URI for the external Identity Provider:
- <AppDomains>
- <AppDomain>https://vqcm.yourDomain.com/</AppDomain>
- <AppDomain>https://login. vqcm.yourDomain.com/</AppDomain>
- <AppDoman>https://yourDomain.okta.com/</AppDomain>
- </AppDomains>
Using VQ Conference Manager Outlook Add-in in Outlook Web Access (OWA)
To use OWA with the VQCM Outlook Add-in you must whitelist your OWA domain.
-
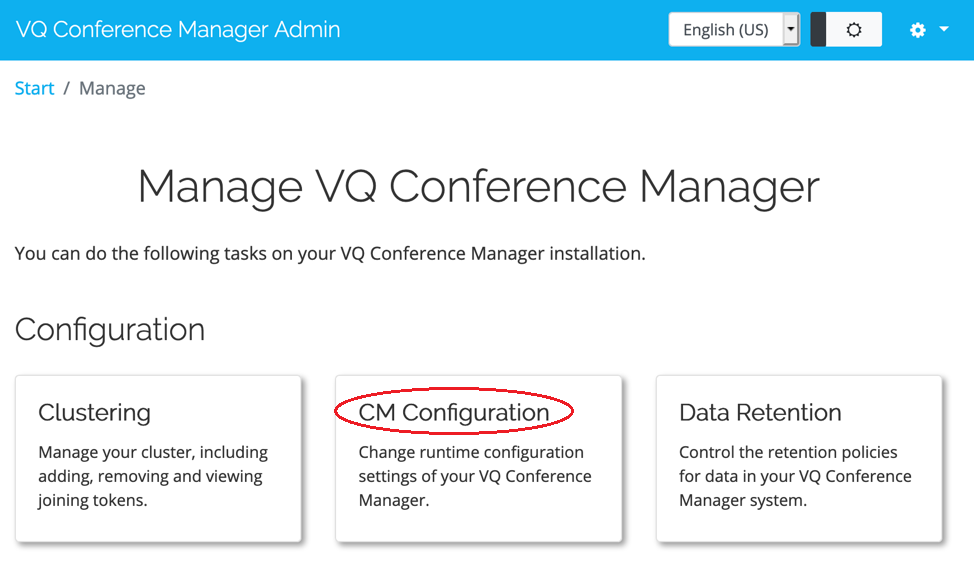
Sign into VQCM-Admin and browse to Manage -> CM Configuration
-
On the next page you will need to enter your Outlook Web Access URI as shown in the screenshot below
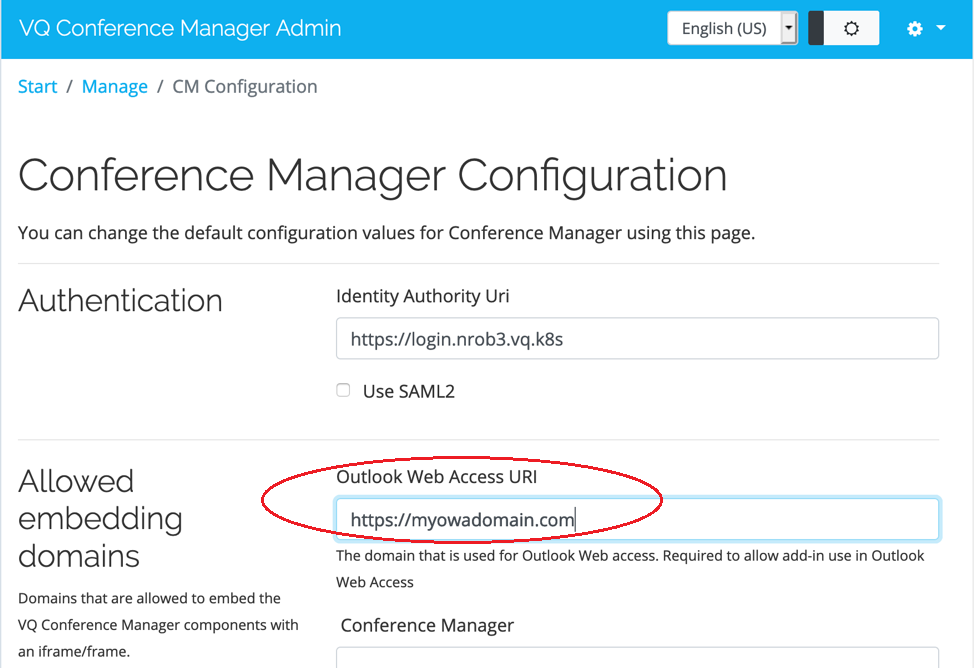
- Once entered click “Save” at the bottom of the page
- Once this is set you should be able to use the VQCM Add-in in OWA
Known Issues
Safari on MacOS doesn’t load add-ins within OWA for Exchange 2016 on premises.
Please see: Safari on MacOS doesn’t load add-ins within OWA for Exchange 2016 on premises.
Please see: https://github.com/OfficeDev/office-js/issues/1057
