Outlook Plug-in - Installing and Using
Preparing the Outlook Plug-in to work with your VQCM system
The Outlook Plug-in authenticates against VQCM using the same OIDC Authentication process as all the other components.
You will therefore need to update the Outlook Plug-in installer to specify the FQDN URIs to use for the login and VQCM URIs.
Please download the “Configuring VQCM Outlook Plug-in Installer” document; it explains how to do this and provides a link (also from vqcomms.com) for the Orca tool to make the changes.
The Orca tool allows other settings on the plug-in to be changed such as service name.
Please also note that before the Outlook plug-in can be used, it needs to be “enabled’ via the VQCM-Admin “Clients” page.
Installing the Outlook Plug-in
To install the Outlook Plug-in:
- Close Outlook.
- Double-click on the Outlook Plug-in installer.
- Follow the Video Conference Plug-in Setup Wizard.
-
Open Outlook.
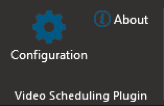
You will see a new Configuration button in the upper right corner.
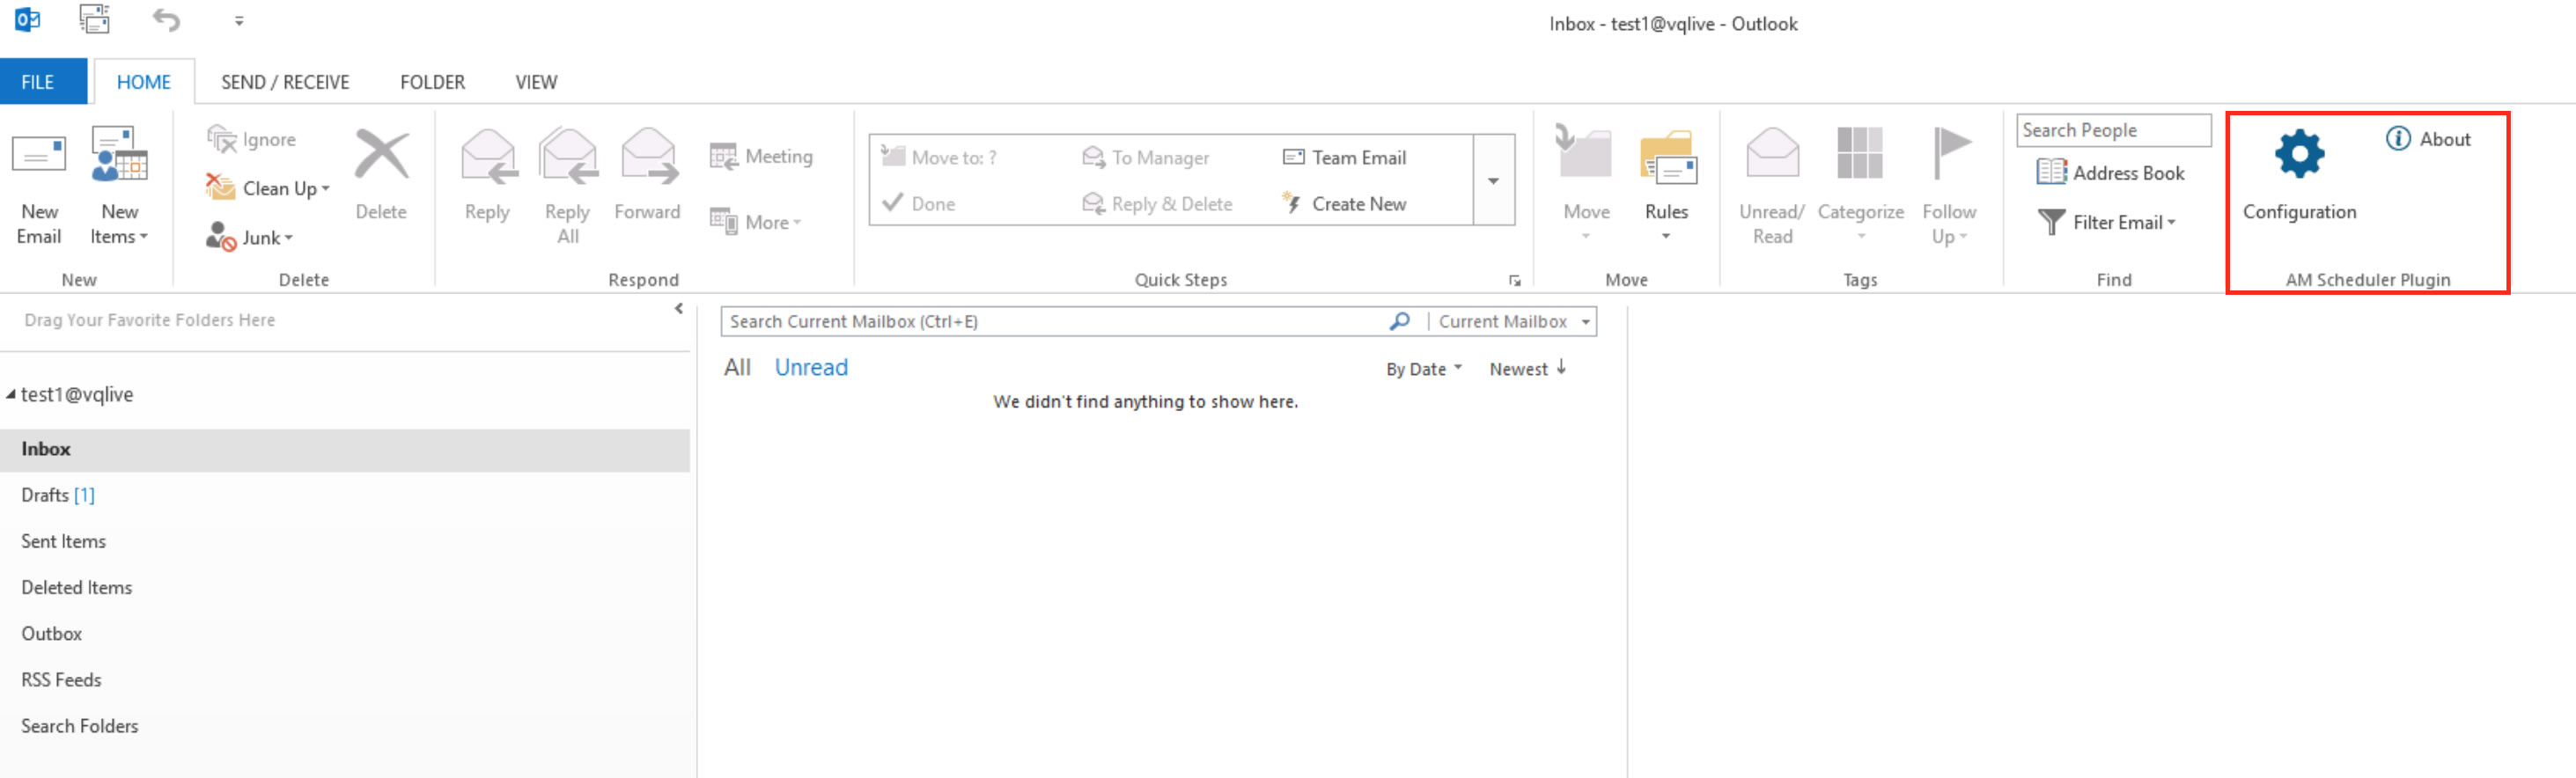
- Click the Configuration button.
- Enter your VQ Conference Manager user name and password.
- If you are using a proxy server, click Connection Setting to configure proxy settings.
- Click Login.
New buttons in Outlook Plug-in
After you have installed the Outlook Plug-in, please note that there is an additional button in the menu. The default name for the button is VQ Scheduler Configuration, but your system administrator may have renamed it. However, the button will be in the same position on the Outlook client user interface, as shown in the figure below.
Figure 1: VQ Scheduler Configuration button
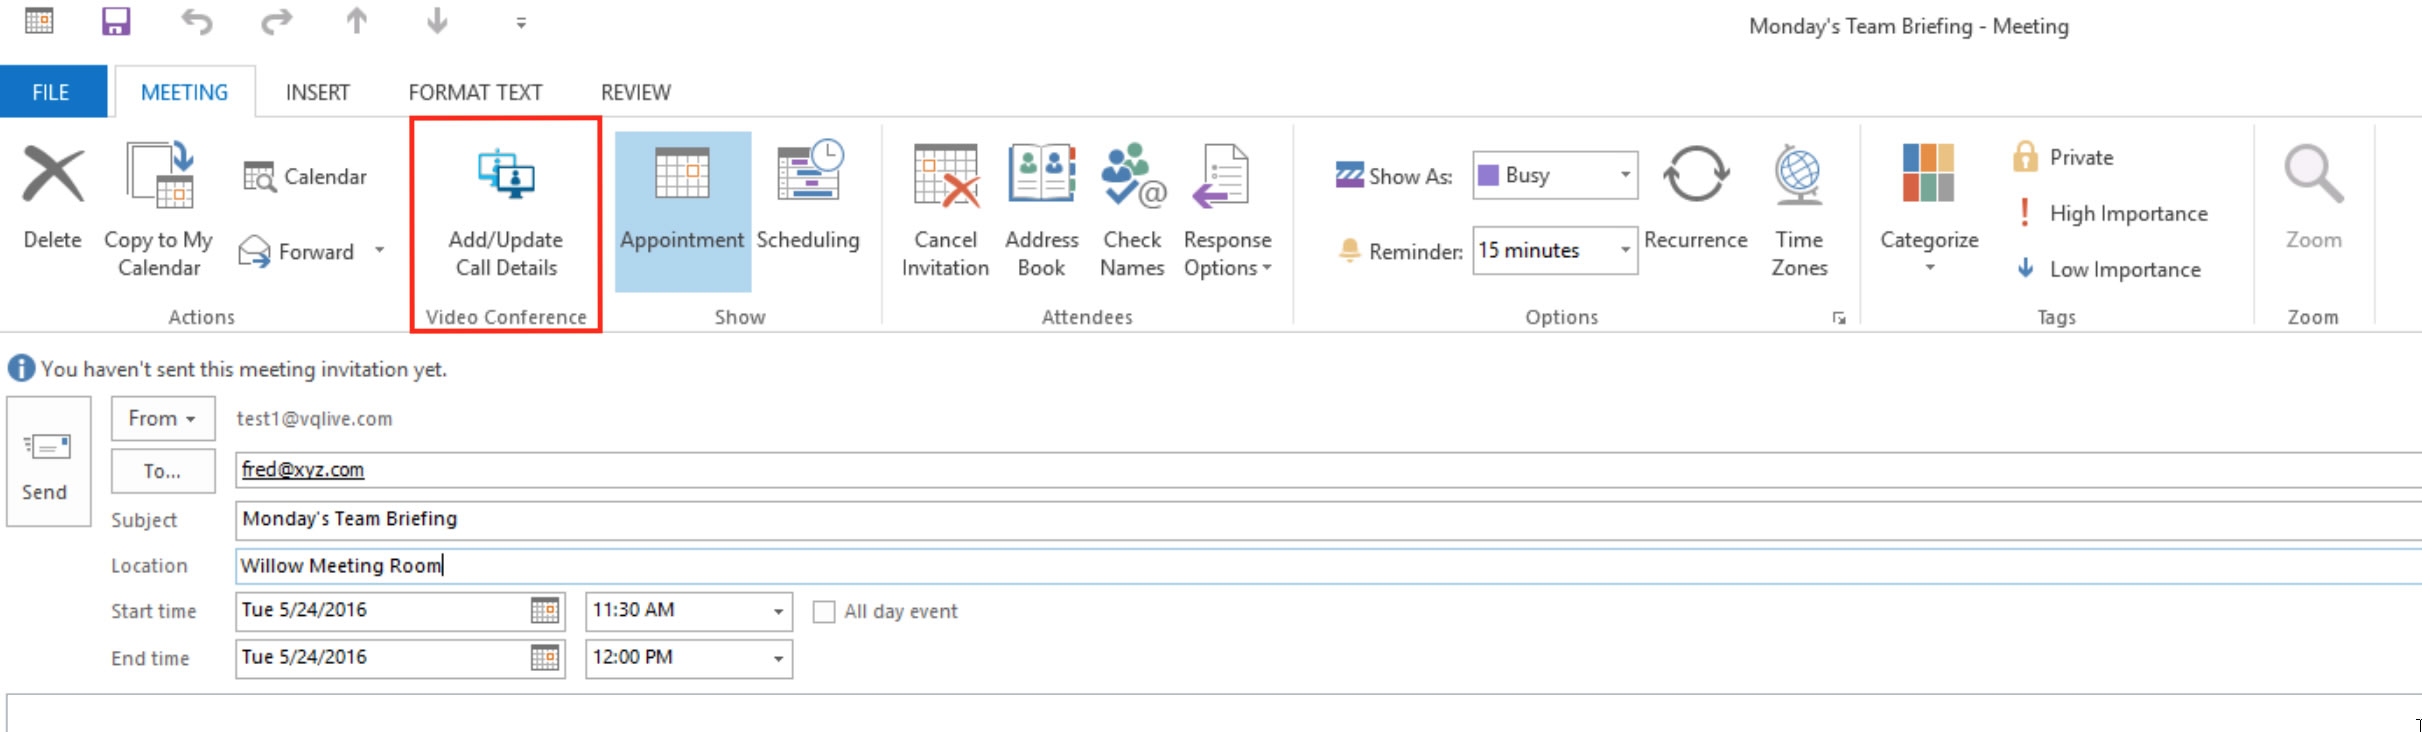
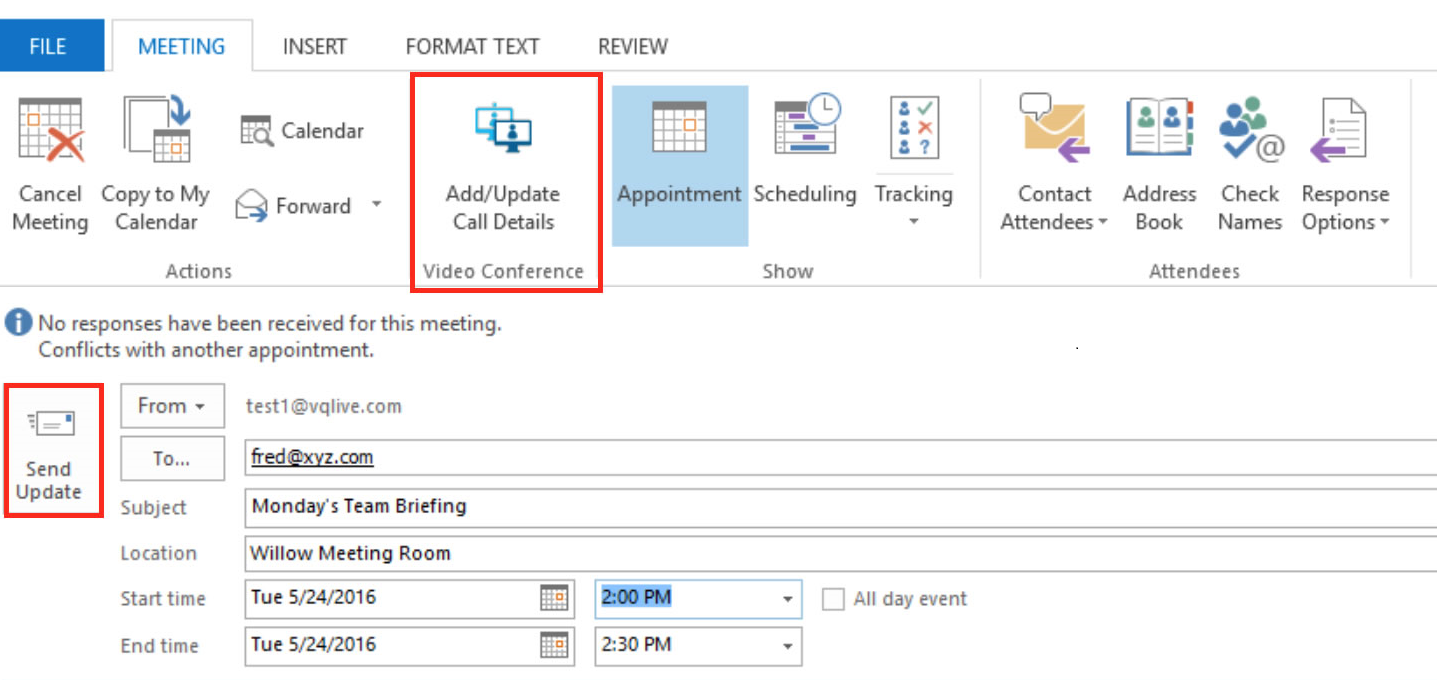
If you now click on Home>New Items>Meeting you will see another new button in the Meeting menu. Again, this button may have been relabeled by your system administrator, but it’s location on the user interface will remain the same.
Figure 2: Add/Update Call Details
Scheduling a call using the Outlook Plug-in
To schedule a video call, navigate to Meeting from Home>New Item>Meeting.
-
Enter the email addresses of the participants that you would like to invite (e.g., Fred @xyz.com)
- Enter a the meeting Subject (e.g., Monday's Team Briefing).
-
Add a Location (e.g., Willow Meeting Room).

-
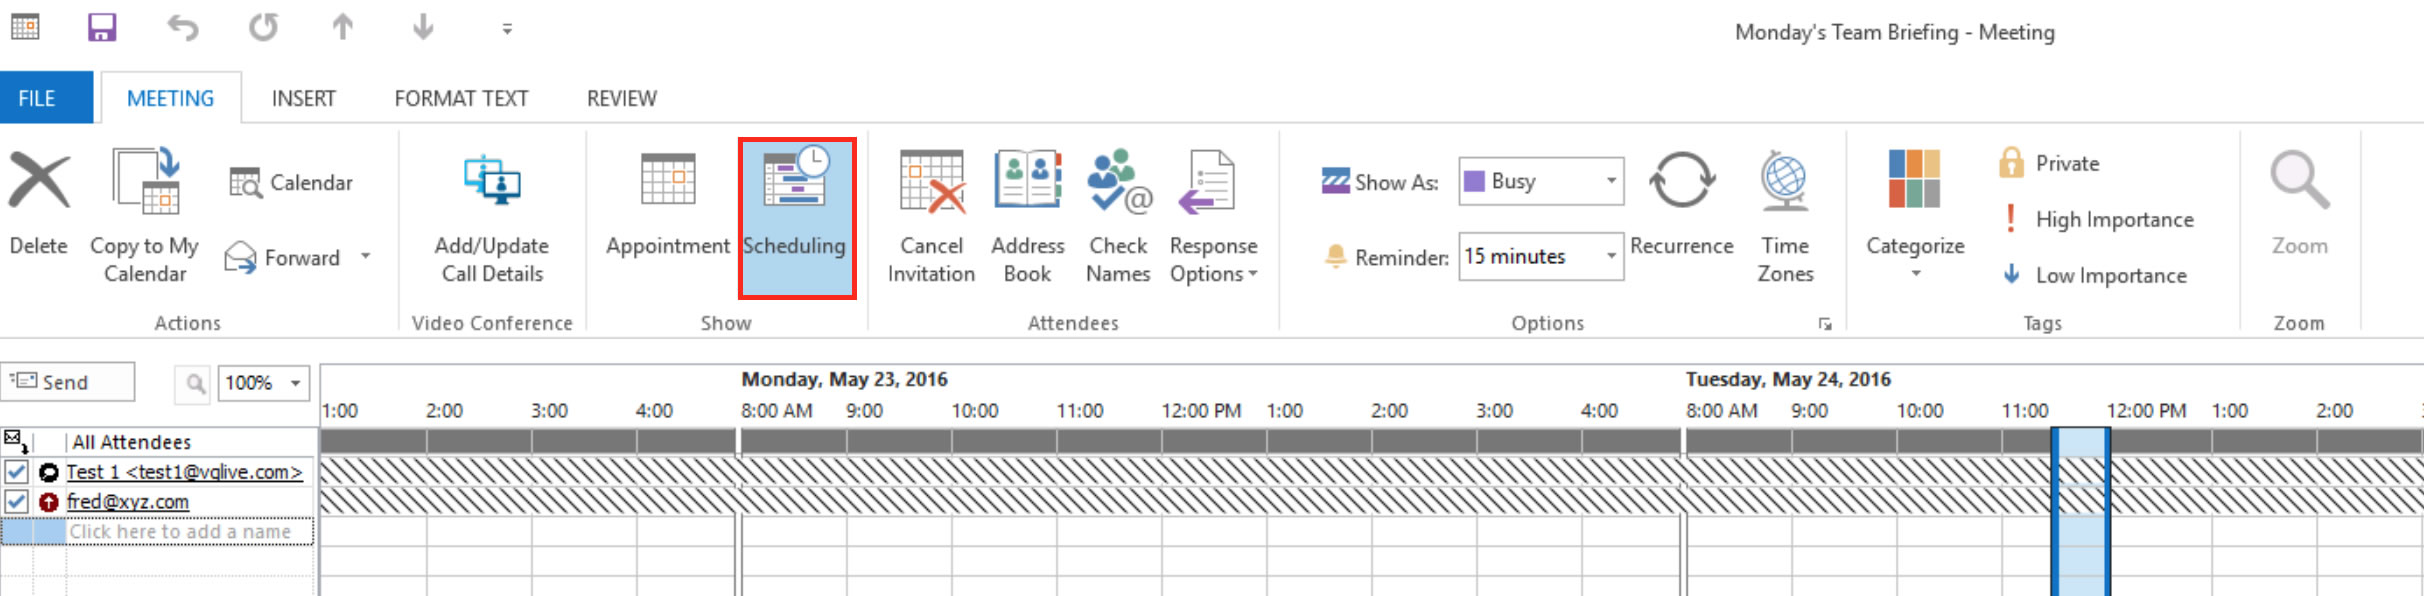
If you need to check scheduling clashes, you can use Outlook's Scheduling function.
-
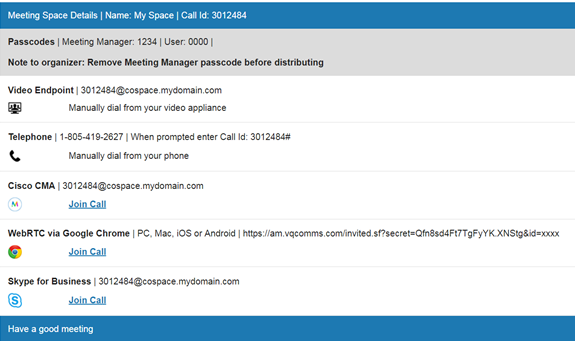
When you have filled in the meeting details, click on Add/Update Call Details. This adds your Space details for video calls.
The Outlook Plug-in then connects to VQ Conference Manager. VQ Conference Manager injects the details of the Space of the person scheduling the meeting using Outlook into the Outlook calendar body. These include the URI Reservation details, how to join the call using the Microsoft Lync client and telephone dial-in details.
-
To complete the process, click Send.
Outlook sends the Meeting Invitation to Exchange which forwards the call invite to every participant, endpoint and meeting room entered in the To field. The Meeting Invitation will appear in the calendar of all participants.
Updating meetings
Meetings can be updated from Outlook by making the amendments to the call time and date, then clicking on the Send Update button.
If you know that the Space details have changed click the Add/Update Call Details button to use the new Space details.
The updated call detail information will display in the Outlook calendar.
Note: VQ Conference Manager has not scheduled a call on the Space. It has simply provided details for the user's Space. For this reason , no record of the call appears in VQ Conference Manager. VQ Conference Manager dynamically creates the call when the first participant joins the Space.
Cancelling meetings from Outlook
- In the Outlook Calendar, click on the call and then click Cancel Meeting.
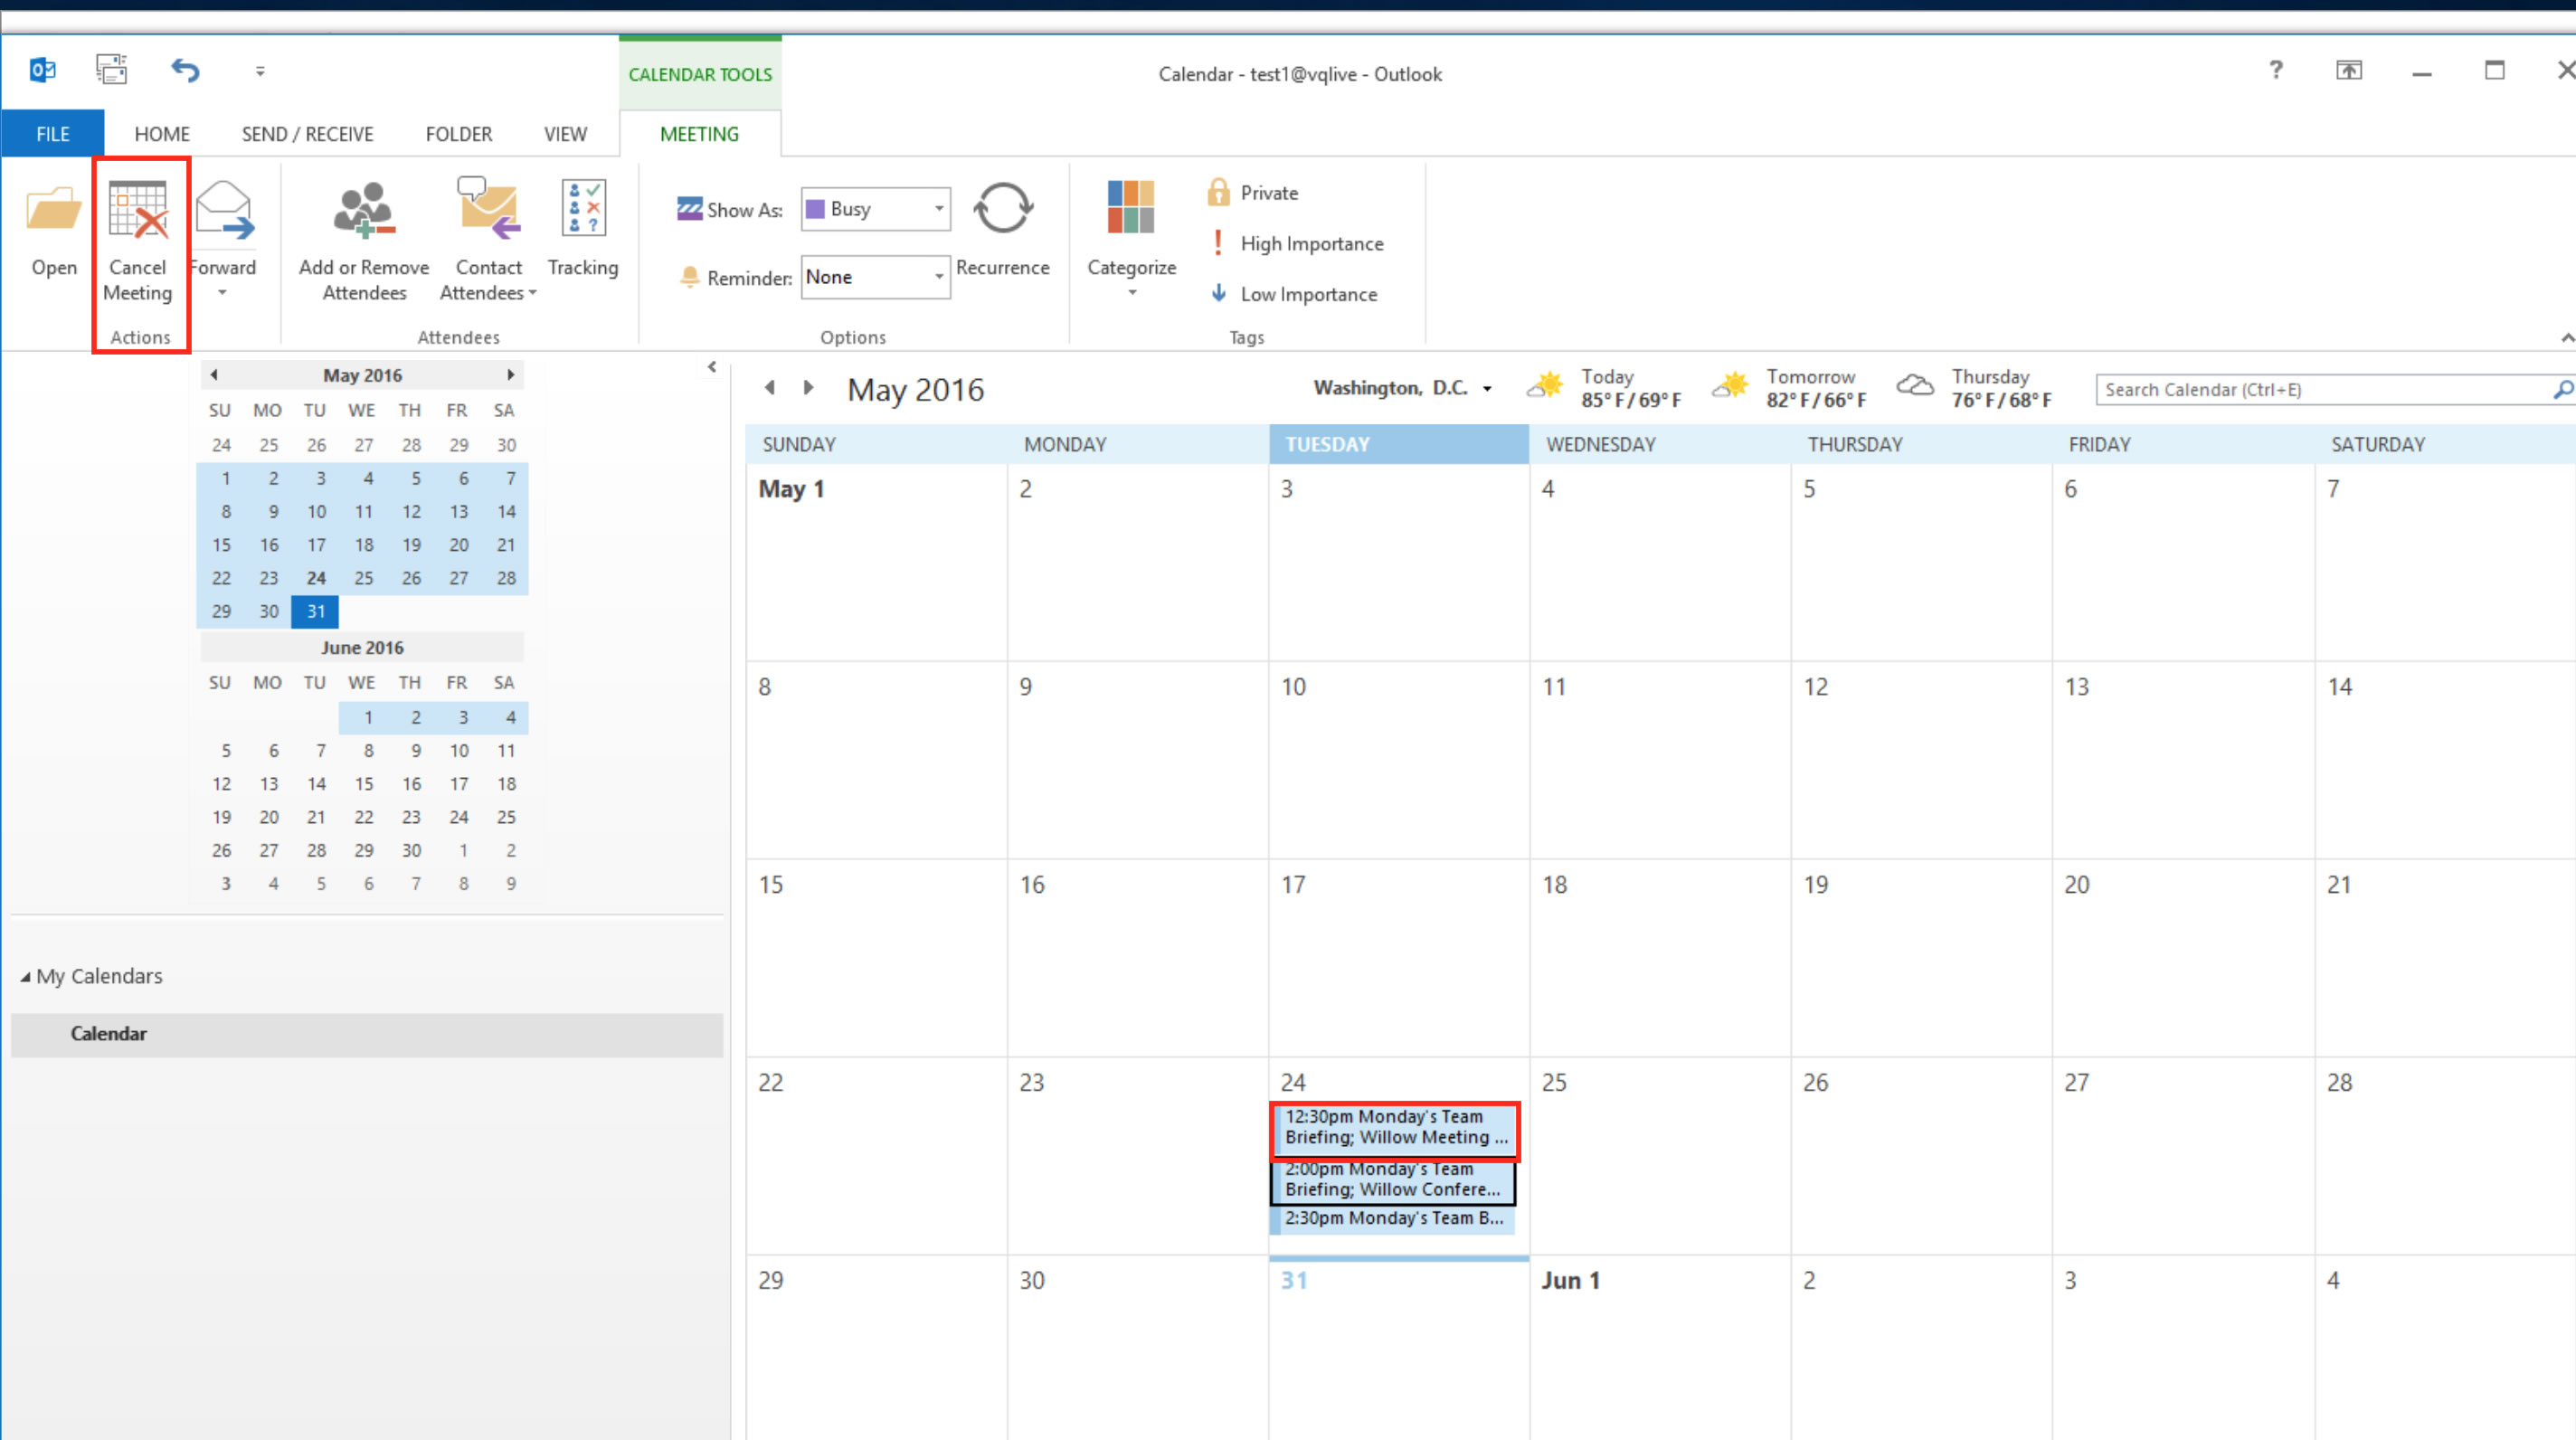
Note: You can only cancel the meeting if you originally set it up.
2. Click Send Cancellation
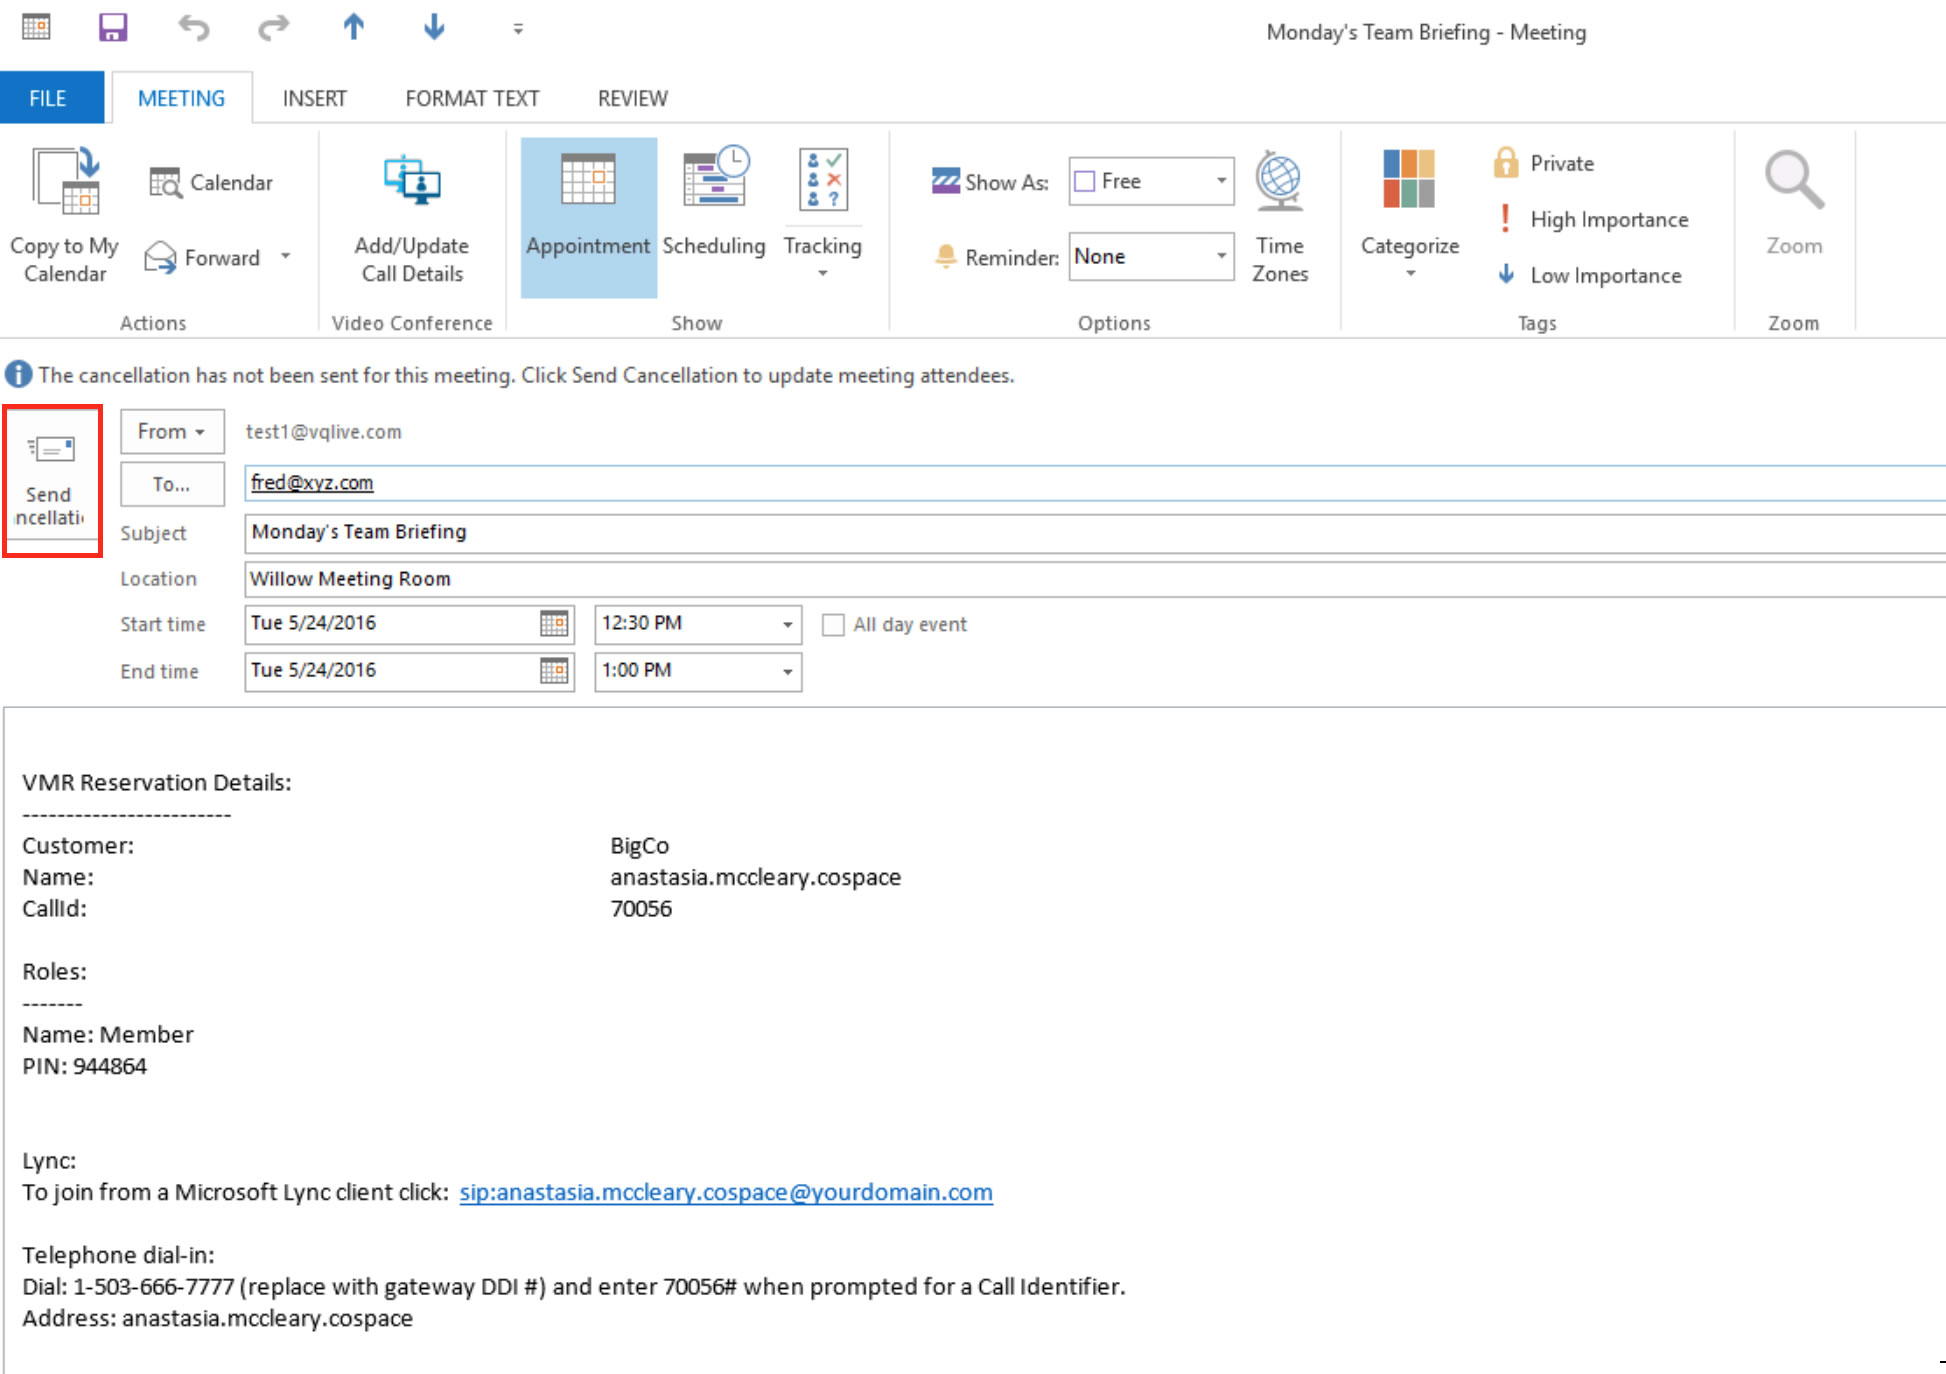
The call is removed from the calendar of all call invitees.
Outlook Plug-in Email Scripting
Note: This section is intended for System Administrators. For additional information regarding Email Template Scripting, please refer to the chapter
The text injected is defined by the script associated with the User Experience (“UX”) Profile associated with the User. As an Administrator, under System>UX Profiles, find the Profile of the User and from that, drill down into Alerts and find the Email Alert template associated with “URI Reservation Details”.
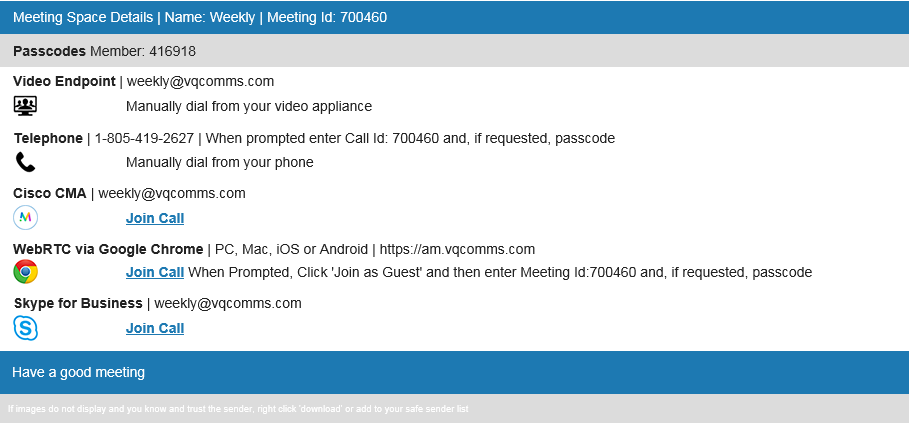
Two predefined scripts are available: UriReservationDetailsIcons.html and UriReservationDetailsWithoutIcons.html. As the names suggest, one contains icons and the other is text only.
The “UriReservationDetailsIcons.html” script will generate a result that looks like this:
If the results you see include the Passcode for each Role, please contact our support team support@vqcomms.com who will guide you thru the process of updating the script to only send Passcodes to Invitees. New installs will install with a script that is able to differentiate between the Host and Invitee Roles. Customers who installed VQCM 3.0 or 3.0.1 will not have the latest, updated script. From VQCM 3.0.2, the script (lines 11-18) looked like this:
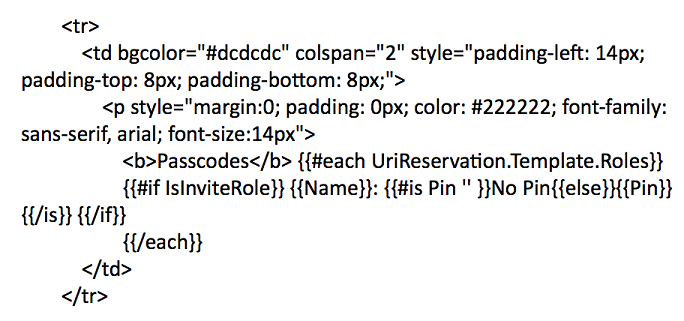
Whereas earlier (VQCM 3.0 and 3.0.1) versions looked like this:
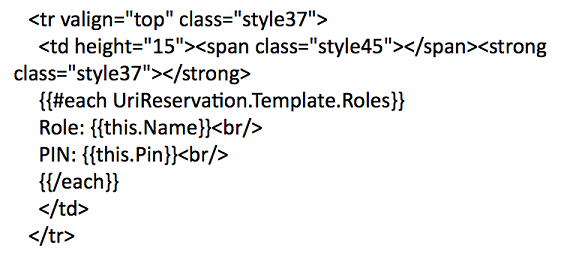
Note how the earlier version does not contain the “#if IsInviteRole” check.
The script language (“Handlebars”) is documented in the Handlebars Expression section in the chapter of this document. A quick summary:
- Commands such as “foreach” or “if” or “is” are terminated by a closing {{/each}}, {{/if}} or {{/is}}.
- “Is” commands evaluate to true if the property matches the '' value specified. In this example, '' is an empty string (no Pin value). The “is” command supports an “else” condition.
- The example above shows an “is else” conditional check within an “if” condition that is, in turn, within a “foreach” loop.
- The “WithoutIcons” versions does not contain the icons for Cisco CMA, Chrome, Skype for Business etc.
Both the domain name for registered SIP/Lync devices and also the dial-in numbers for your network can be changed from UriReservationDetails.html

3. Click Done.
Outlook Plugin Switching User
After signing in to the Outlook Plugin, you will remain signed in for 15 minutes on the browser used to complete the process.
To ensure that you switch user correctly:
Open your default browser (this will be the browser opened by the Plugin to complete the login process).
Browse to VQ Conference Manager. If you are redirected to a login page there is nothing else to do.
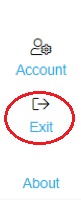
If you are still signed in, click “Exit” at the bottom left of the VQ Conference Managerpage:
Once you are redirected to a login page you can safely log out and log back in as a different user.
Switch User
Click “Configuration”:
Click “Logout”
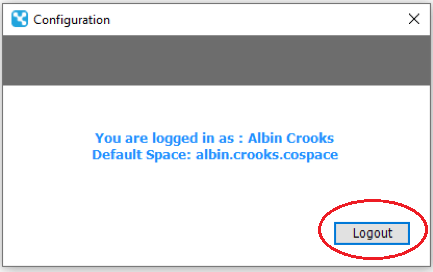
Login again as normal.