How to guide - TMS to DMA Migration
The following is intended for those wanting to begin testing DMA and planning for a migration from TMS to DMA. In this guide we will explain how to locate your TMS database, create a copy, install and run the TMS to DMA export/import utility, build your Data Sources and create and deploy your first Address Books.
It is assumed that the reader of this guide is an experienced user of TMS with an in depth understanding of how the Phone Books features of TMS work and how Cisco videoconferencing devices connect to and use TMS Phone Books.
To use this ‘How to’ guide you will need to have installed and configured DMA following the steps outlined in the VQ Conference Manager Release Notes (and also in the VQCM User Guide), Setting up DMA section.
Find and connect to your TMS data
Locating the TMS Database Settings
The TMS SQL Database can be co-located alongside the TMS Server (using SQL Express) -or- hosted remotely using enterprise versions of SQL server.
The easiest way to identify the TMS Database connection settings:
-
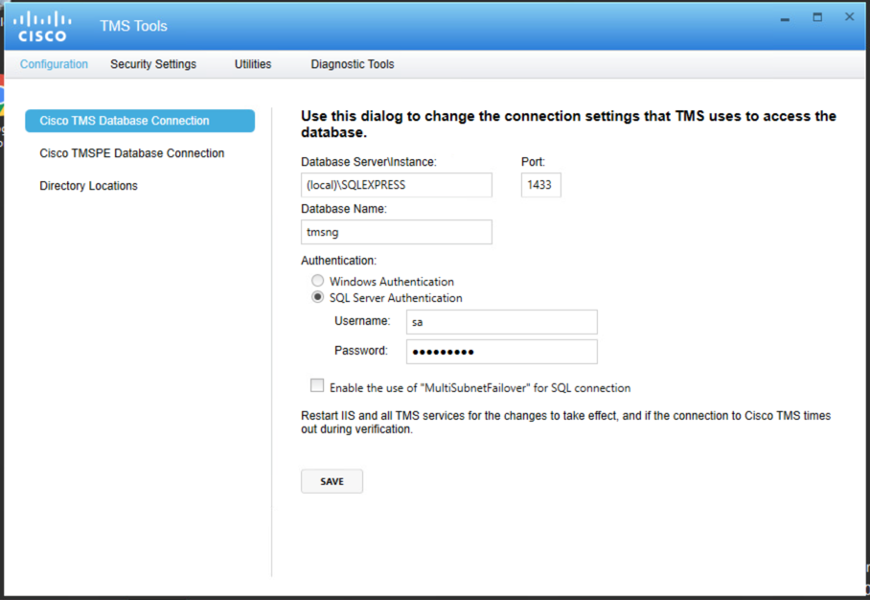
Login to the TMS Windows Server and open the TMS Tools from the Windows Start menu
-
Navigate to Configuration / Cisco TMS Database Connection
-
Take note of the Database Server & Authentication details
-
Database connection will either point to a local SQLExpress instance (named (local)) or display the remote SQL Server details:
-
NOTE: In this example the TMS Server is using SQLExpress co-hosted alongside the TMS Server (local):
-
-
If you do not have access to the TMS Windows Server to run TMS Tools, you can also check the TMS Database details using the TMS Web Portal
The TMS Portal method does not give you the database user details, but can still help to identify the SQL Server owner/admin.
-
The TMS Portal method does not give you the database user details, but can still help to identify the SQL Server owner/admin.
-
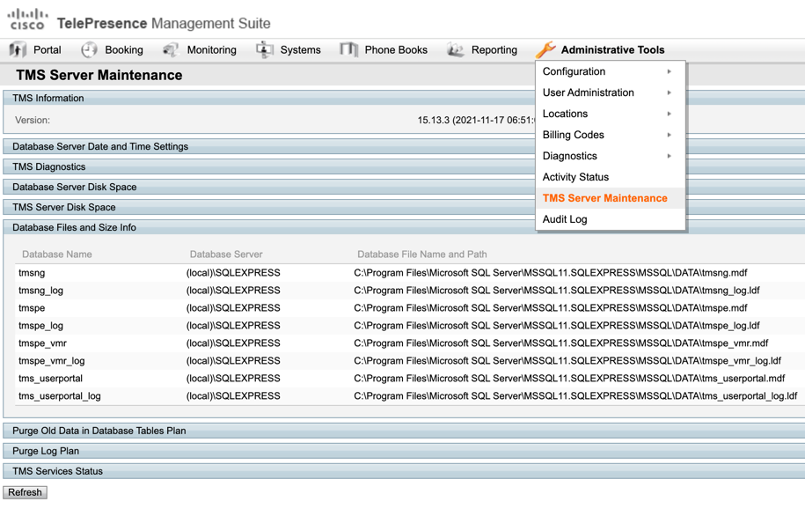
Login to the TMS Web Portal
-
Navigate to Administrative Tools / TMS Server Maintenance
-
Expand the section named Database Files and Size Info
-
Validate the Database Server in use for tmsng:
-
-
Creating a Database Backup or Database Export
To safeguard the active TMS database, it is recommended to make a Backup or Export of the active tmsng database. DMA Migration Tools can then use the backup/export tmsng database to perform data migrations.
To use the SQL Studio Back Up feature on the tmsng database:
-
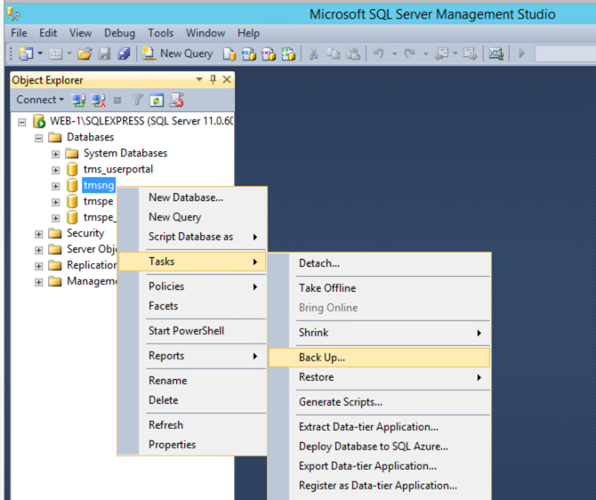
Login to the SQL Server using SQL Management Studio
-
Ensure the user has access to manage the tmsng database
-
Navigate to Databases / tmsng
-
Right-click on the tmsng database and select Tasks / Back Up:
-
-
On the Back Up Database Menu
-
Ensure the Backup Type is set to Full
-
Check the Backup destination is a location you can access
-
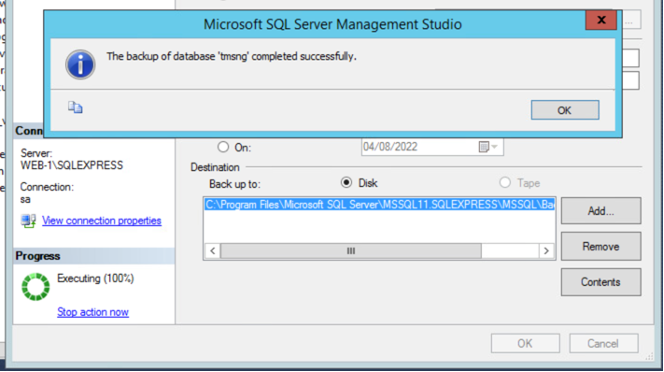
Once settings are verified, select OK to initiate the backup
-
Once complete, you can use the Backup file to re-import the database elsewhere (naming the new database tmsng-dma):
-
To use the SQL Studio Database Export feature on the tmsng database:
-
Login to SQL Management Studio and connect to the SQL server where you will create the new Database to Export TMS data to
-
Right click on the top-level Database menu and select New Database:
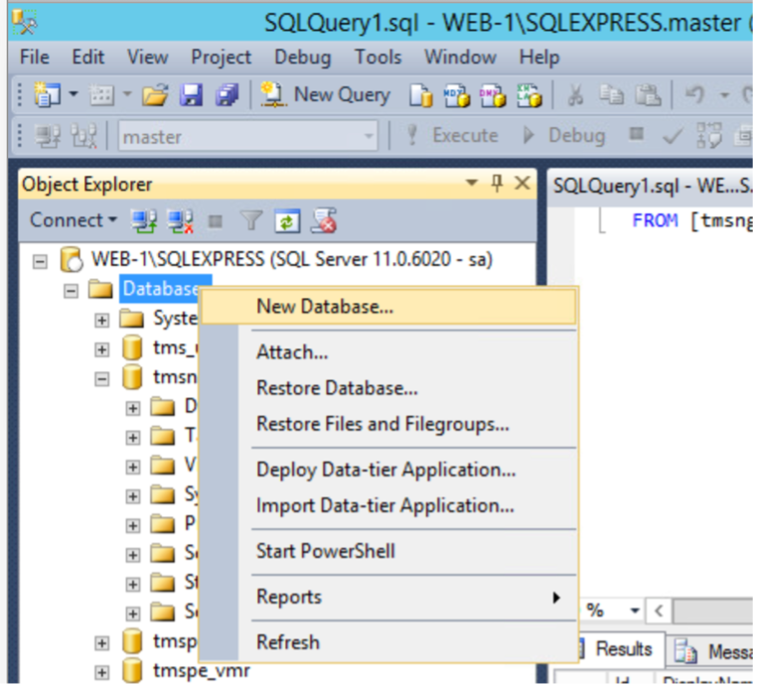
-
Create a new SQL Database named tmsng-dma. Use the standard/default settings for the database creation
-
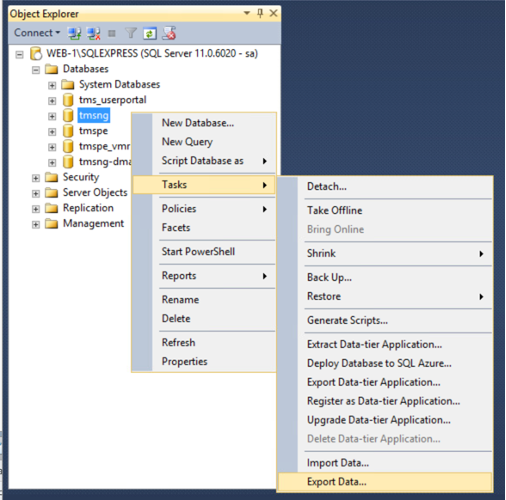
With the new tmsng-dma database created, use SQL Management Studio to connect to the original TMS SQL Server
-
Once connected to the TMS SQL Server, right-click on the tmsng database and select Tasks / Export Data:
-
On the Export Data Wizard, the following steps are required:
-
On the Data Source screen, select the Server Name where the original tmsng database is located
-
Set the required Authentication type
-
Once the Server & Authentication is selected, change the Database option to point to the original tmsng
-
Select Next
-
-
On the Data Destination screen, select the Server Name where the new tmsng-dma database is located
-
Set the required Authentication type
-
Once the Server & Authentication is selected, change the Database to point to the new tmsng-dma
-
Select Next
-
-
On the Table Copy/Query screen, select the default Copy data from one or more tables
-
Select Next
-
-
On the Select Tables View Screen, highlight all tables by selecting the top-level tick box:
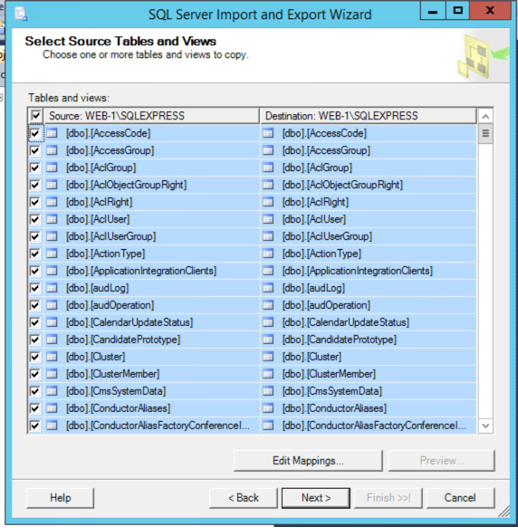
-
Select Next
-
-
On the Run Package screen, leave the default settings
-
Select Next
-
-
The final Wizard Menu screen will now outline the Exporting Data and criteria
-
Select Finish
-
-
The Export will now copy data to the new tmsng-dma database:
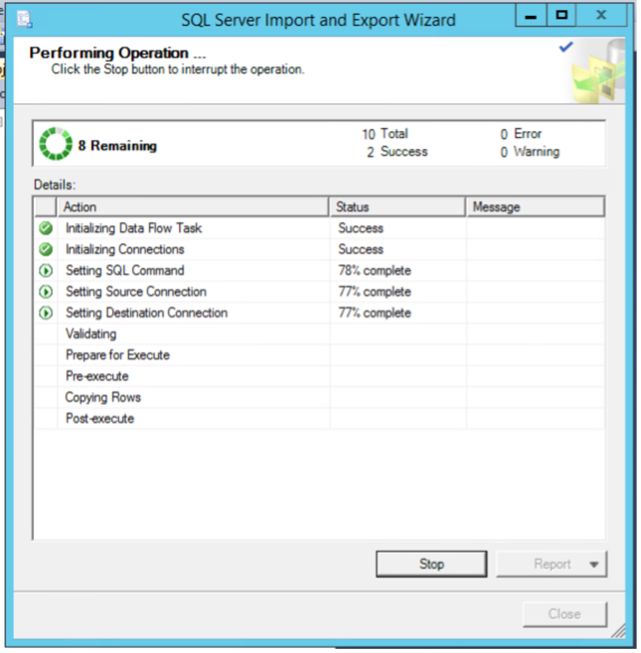
-
Once complete, validate any warning or error messages
-
You should now be able to configure the DMA Migration Tools to point to the new tmsng-dma database
-
-
Import your devices from TMS
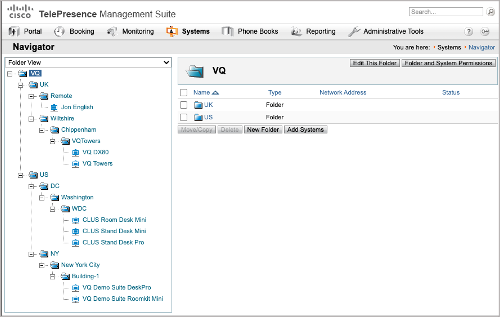
The purpose of this tool is to export the device and location hierarchy data needed by DMA to create Address Books related to devices in your TMS system and import it into DMA.
Before you start
This tool must be run on the Windows machine that contains the TMS SQL database, and as such we recommend that you work with a copy of it (obtained according to the instructions in the previous section), or a non-production/lab server. You will need connection details to this database that you should now know from the processes in previous section.
Set up VQCM authentication client
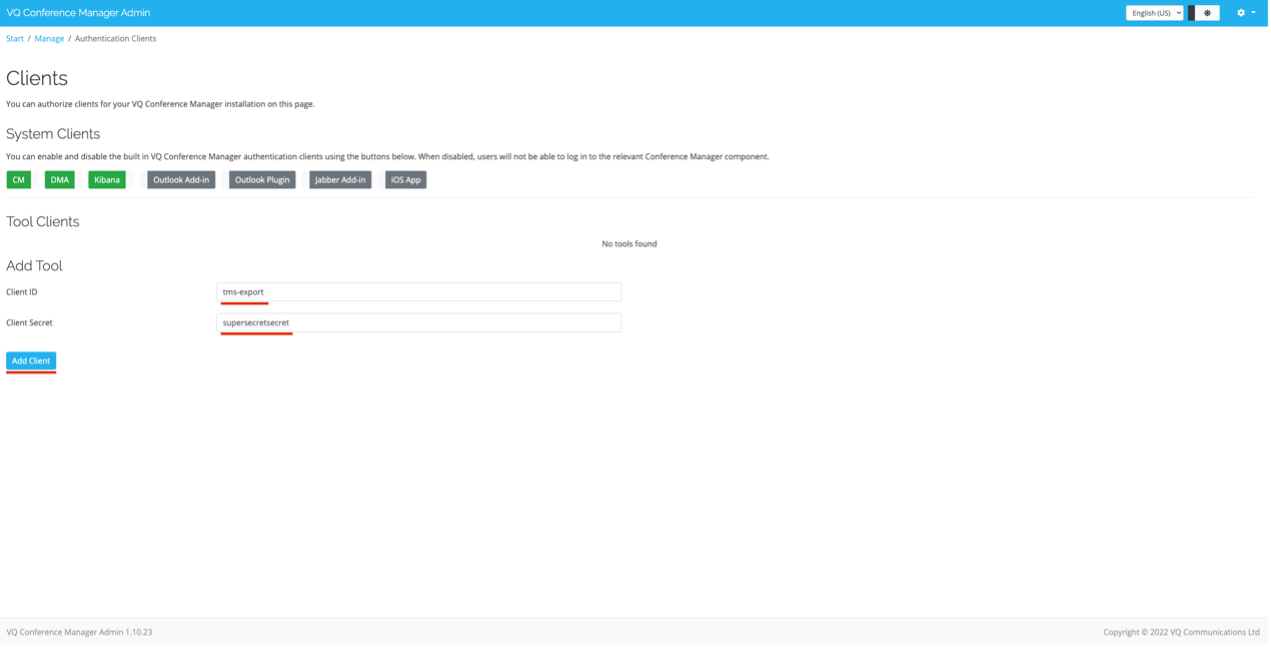
For the tool to post the data exported from TMS to DMA, it will need to authenticate to the VQCM server. You will need to create a client for it to use from the CM-Admin page (port 1234):
-
Log in to CM-Admin
-
Navigate to Manage > Security > Authentication Clients
-
Create a tool client. Make sure you take note of the ID/password, as you will need them later when configuring the tool:
Configuration
-
Download the TMS to DMA Migrator tool from our Customer Portal
-
Unzip it into a convenient folder
-
In the extracted folder, you will find a configuration file called “config” (.json extension). Please open it using Notepad++ or similar, as the default Windows Notepad will make it difficult to read:
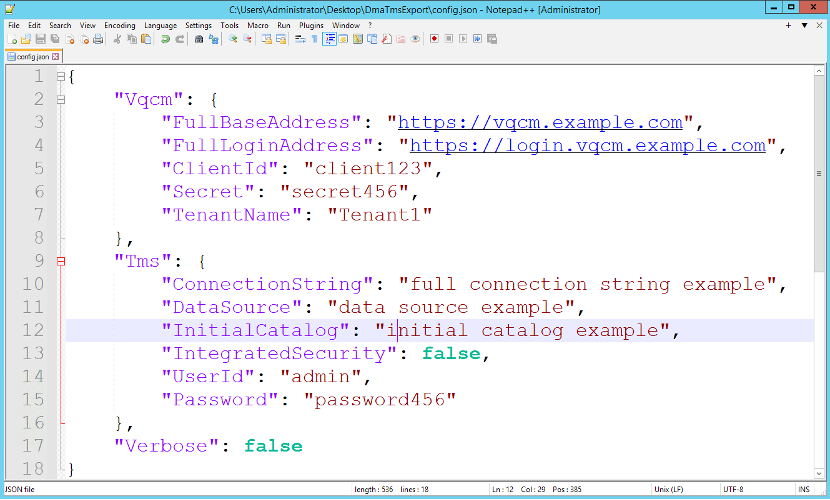
Above: The config.json file viewed in Notepad++
Here are the parameters to configure:
|
VQCM |
|
|---|---|
| FullBaseAddress | Full address of VQ Conference Manager. Can be found on the home page of CM- Admin |
|
FullLoginAddress |
Full address of VQCM’s Identity Server. Can be found on the home page of CM- Admin |
| ClientId | The Client ID configured in CM- Admin |
| Secret | The Secret configured in CM- Admin |
| TenantName | Name (case sensitive) of the Tenant to host the migrated TMS objects in DMA |
|
TMS |
|
|---|---|
| ConnectionString | The full connection string to use to connect to the TMS database (option 1) |
|
DataSource |
Path to the TMS database, constituted of the server name and instance name (option 2&3) |
| InitialCatalog | Name of the TMS database (option 2&3) |
| IntegratedSecurity | Enables the use of Windows Integrated Authentication to log in with the current user's Windows Credentials. Can be “true” or “false” (option 2) |
| UserId | Name of the user to use to authenticate to the TMS database (option 3) |
| Password | Password to use to authenticate to the TMS database (option 3) |
|
|
|
|---|---|
| Verbose | Enables the verbose logging, should only be used for debugging issues |
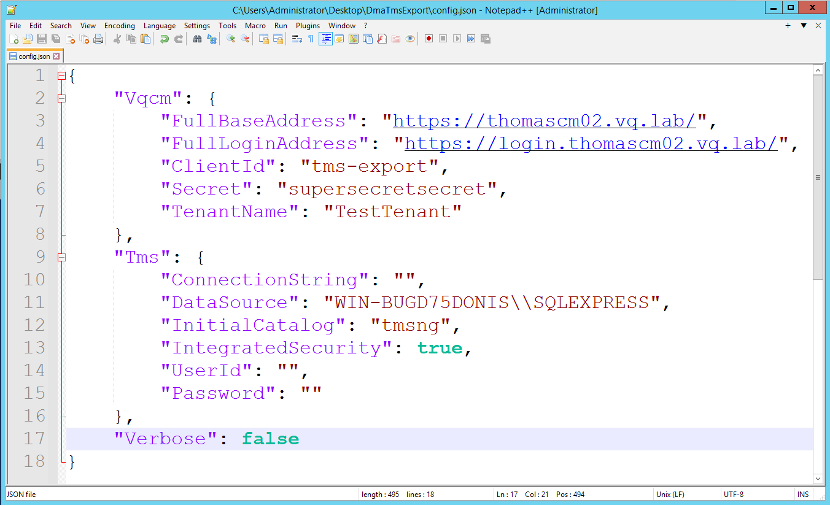
It is important to understand that not all the TMS connection parameters are required; there are 3 options for the tool to connect:
-
(Option 1) If the full connection string is provided, the tool will use that and ignore the rest
-
If there is no connection string, it will use the DataSource and InitialCatalog to locate the database. It will then:
-
(Option 2) Use the integrated authentication if enabled, and ignore the rest
-
(Option 3) If disabled, it will use the provided credentials to authenticate
-
Below is an example of a valid config file (using integrated security to authenticate) that will be use in the further examples:
Run the tool
You can now either double click on the “DmaTmsExport.exe” file, or run from the command line:

If run from the command line, you will see the logs from the running application in real time. Either way, a time stamped log file will be produced in the same folder,
(for example “LogFile-2022-08-05_14-02-53.txt”):
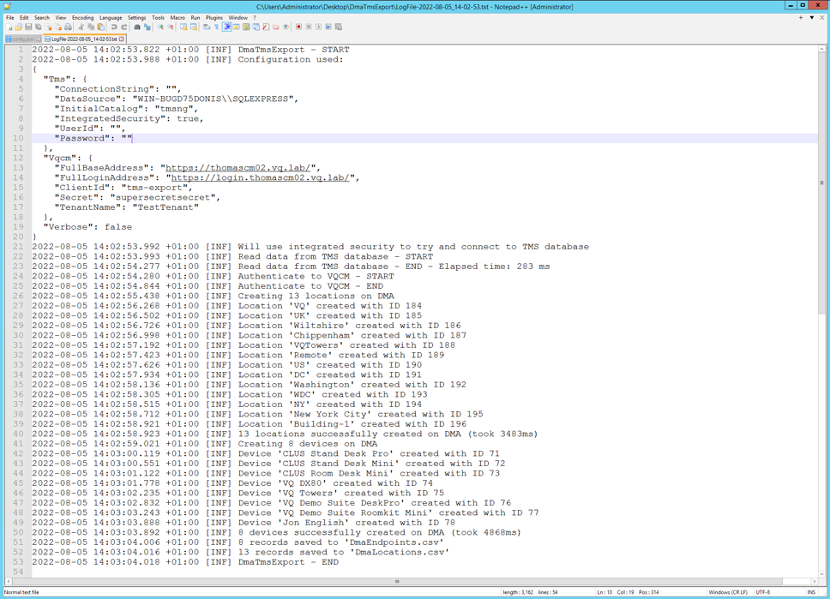
The logs will confirm if the migration was successful and how many objects were imported to DMA, and if any errors happen. In that case, please contact support at support@vqcomms.com.
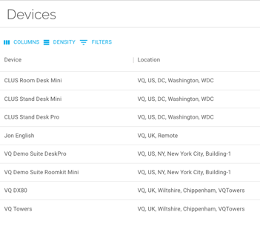
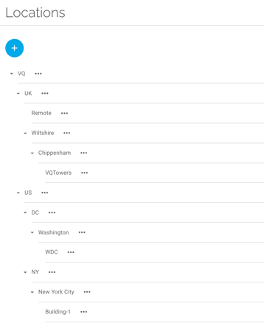
You can now log in to DMA and confirm that the Device and Locations are there as expected:
Define your Data Sources in DMA
Having imported your TMS data to DMA you will now have items in the Devices list and a tree structure in Locations:
You are now ready to move on to setting up your first Address Book for use by your VC endpoint devices.
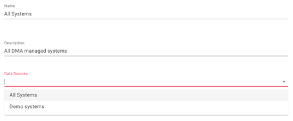
By default, DMA creates a Data Source named ‘All Systems’ and this can be used to create your first Address Book.
Click on the Data Sources option in the main side-bar menu:

If you want to use a sub-set of the DMA Internal Device list to create an address book to be used by specific devices, then you will need to create a new Data Source. This new source can be filtered to contain only the devices you wish to appear as contacts in it.
Select the ‘Add New’  button at the top of the page:
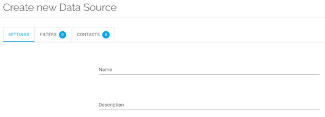
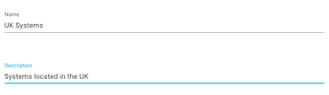
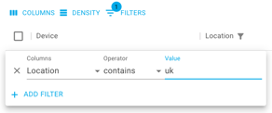
Give the new Data Source a name that describes the devices that you are going to filter into this new source, e.g., ‘UK Systems’:
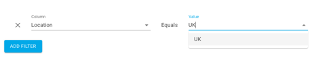
Create a filter that selects only the devices that you want in the final Address Book, e.g., ‘Location - Equals - UK’:
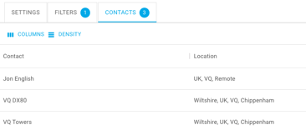
Confirm that the endpoints you are expecting to see are now selected and Save the data source:
NOTE: In this first release of DMA there is only one Data Source available, the Internal DMA device database. This can be created from imported TMS device data or using a specially formatted CSV file.
Future releases will include Data Sources that have been created by connecting to external sources of data such as CUCM, Active Directory or LDAP.
Create your Address Book
To create an Address Book, you must first have a Data Source to connect it to. This will have been done in DMA v1.0 either by importing the devices from TMS or importing from a CSV file using the CSV Import Tool available from VQ.
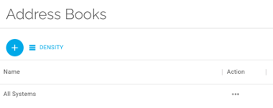
Select the Address Book feature from the side bar menu:

Create a new Address Book by clicking the ‘Add New’ button at the top of the page
Select the Data Source that will be used to create this Address Book:
Save the Address Book:

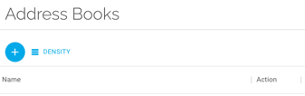
The Address Book list will now show the address book:
Assign your Address Books to some endpoints
To provide access to an Address Book from a video endpoint device or group of devices use the ‘Assign’ action.
Select Address Books from the side bar menu:
Locate the Address Book to be assigned to and click on the ‘Action’ button:

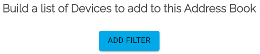
Select ‘Assign to Devices’ from the drop-down menu to enter the Address Book assignment tab:

Once in the Assign to Devices page click the ‘Add Filter’ button:
Using the filter creation box build your list of devices to be assigned the Address Book:
Once you’re happy with the list, check the boxes of the systems to be assigned the address book (the top box selects all devices shown on the current page) click the ‘Assign’ button to make the Address Book available to the selected endpoint devices:

Change the Phone Book URL on your device(s)
For a Cisco VC endpoint device to use an Address Book (Phone Book in TMS) it must be pointed to the DMA server. This you can do directly through the device’s web browser interface or using a TMS template sent to the device. The template approach might be more efficient if you want to test with several devices.
Changing the (Phone Book) URL in the browser interface
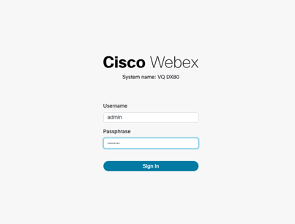
In your web browser enter the IP address of your device and log in using an Admin permissioned user:
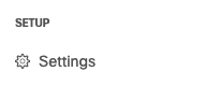
Navigate to the Settings page under Setup…
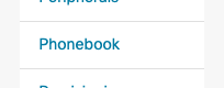
Once in Settings select Phonebook from the sub menu:
Paste the URL of you DMA Directory Server into the URL field at the bottom of the ‘Server 1’ box…

The URL of your DMA Directory server is constructed using the Fully Qualified Domain Name (FQDN) of your VQ Conference Manager server:
https://FQDN/api/v1/dma/tmsaddressbooks/PhoneBookService.asmx
Changing the (Phone Book) URL using a TMS template
In TMS navigate to Systems > Configuration Templates > Configuration Templates

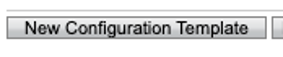
Click on New Configuration Template:
Using the Advanced Settings tab search for ‘Phonebook server’ in the ‘Cisco Telepresence CE Endpoints’ set:
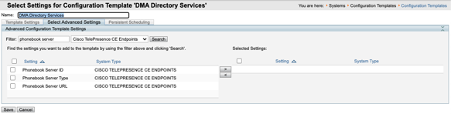
Select Phonebook Server Type and Phonebook Server URL to be used in the template:
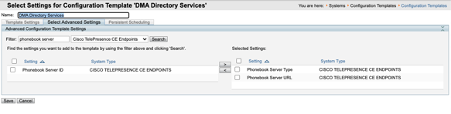
Go to the Template Settings tab to set the required values for the template:

Set the Phonebook Server Type to ‘TMS’ and the Phonebook Server URL to your DMA Directory Server’s URL. The URL of your DMA Directory server is constructed using the Fully Qualified Domain Name (FQDN) of your VQ Conference Manager server:
https://FQDN/api/v1/dma/tmsaddressbooks/PhoneBookService.asmx
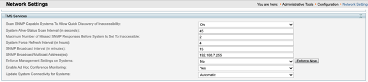
Configure TMS so it doesn’t think it owns the device and overwrite the DMA settings
During development and testing at VQ we have found that TMS servers will switch the ‘Phonebook Server’ settings of devices back to point at their directory service if the Network setting ‘Enforce Management’ is set to ‘Yes’.
Some alternative directory developers in the past have opted to run their own service that polls endpoints on a regular basis and set the ‘Phonebook Server’ settings to point at their service, effectively getting into a ‘fight’ with TMS over who’s service to use.
Having discussed this with Cisco, VQ has chosen not to take this approach but instead to recommend that ‘Enforce Management’ is turned off (set to ‘No’) for testing purposes. This recommendation is under review for the move to production and VQ may also introduce a service to maintain the new setting.

Testing it works, doing a device lookup from the device
On the touch panel or touch screen of the devices that you assign the Address Book to you will now see that the Directory feature is ‘lit’ (if it wasn’t previously using a TMS Phone Book) and when selected you will see a list of the Address Books that the device can read from.
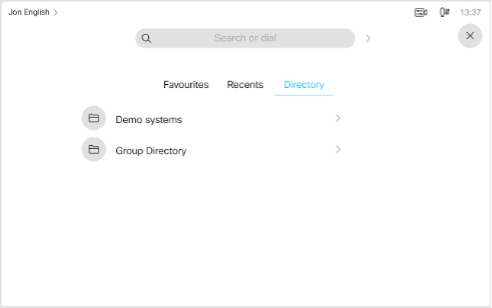
One difference you will notice between DMA and TMS is that even when there is only one Address Book assigned to a device, we still show the folder for that Address Book, whereas TMS will switch to showing every entry in the one assigned Phone Book.
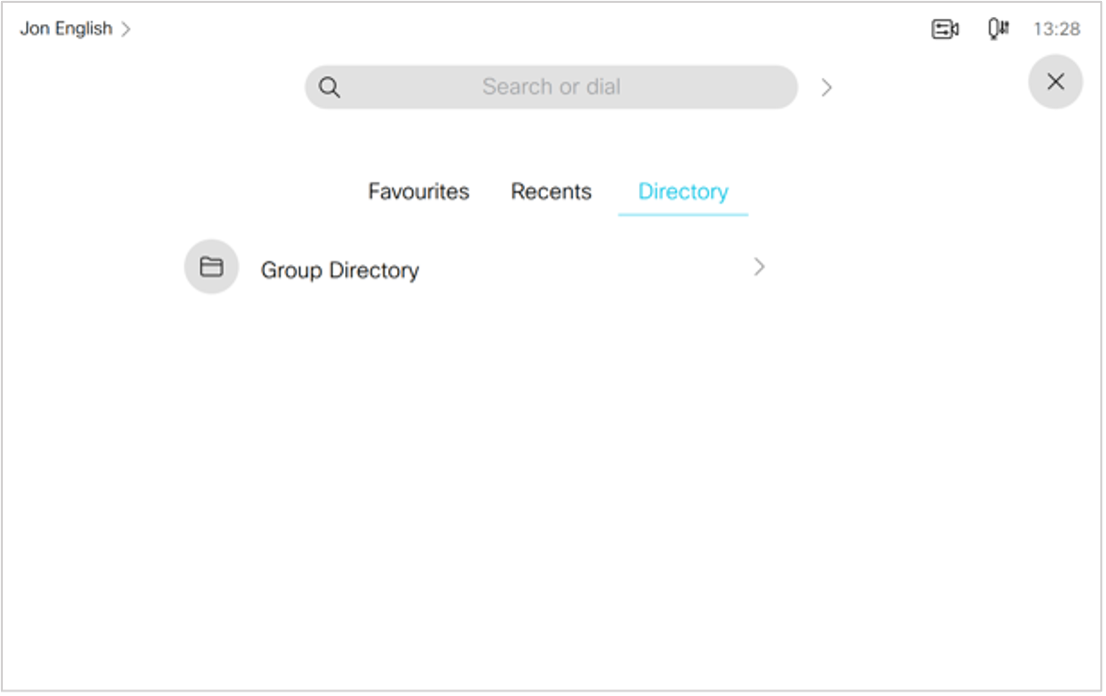
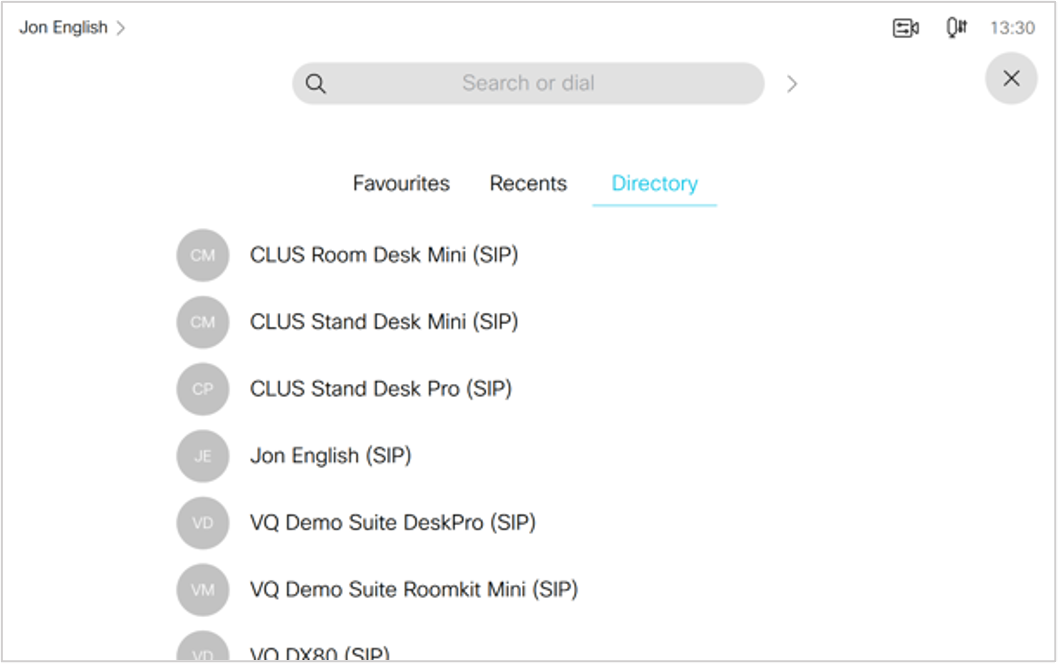
We have chosen to do this to give the user an indication of what Address Book the device is able to access and therefore provide a guide as to how many entries they might be scrolling or searching.