VQ Conference Manager - Device Management and Automation (DMA)
Welcome
VQ Conference Manager – DMA* (DMA) is designed as a replacement for Cisco TelePresence Management Server (TMS) deployed ‘on premises’ as part of a Cisco Meeting Server and Cisco videoconferencing devices eco-system.
DMA tooling is also provided for the ability to import all your current templates from your existing TMS environment.
* DMA is an extension to the existing Cisco recommended VQ Conference Manager platform
DMA supports Cisco collaboration devices running the CE/RoomOS operating system
DMA Overview
Page Features & layout.
Administrators have full access to DMA. Users with restricted permissions will not have access to all menus and options.
Side Bar Menu
DMA functionality is grouped by main categories on the side bar menu:

Exit

The Exit button is always shown at the bottom of the side bar and will log you out of DMA and return you to the VQ Conference Manager login page.
Drop Down


Clicking on fields with a small triangle ‘twisty’ at the end will display a drop-down menu, as will clicking on the three dots shown in any ‘Action’ column.
Lists

You can re-sort most lists in DMA by clicking the title of the relevant column. A small arrow next to the column title will indicate whether the sorting is ascending or descending. Some lists may have hundreds or even thousands of entries. Rather than show them all in a single list, most lists in DMA are split into pages with < and > arrows at the bottom.
Filters
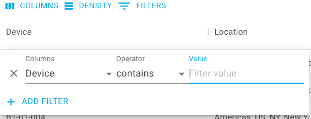
Clicking on the Filter icon above most Device lists will display a filter creation box that allows you to filter in or out devices to/from your selection. Devices can currently be filtered by Name, Location and Label.
Tabs

Many pages in DMA have multiple views available, shown as tabs across the top.
In the screenshot above, there are multiple pages available, including View, Assign, Remove, and Activity. The active tab is displayed with blue text and underline.
Add to List

Where it is possible or required that a list can be created or added to the, Add to List ‘+’ icon is displayed at the top of the list.
Edit a List Action

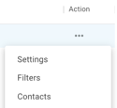
Where it is possible to execute an action on items in a list the three dots icon will be displayed. Clicking this icon will display a Drop-Down list of actions.
Workflow Guidance

Several functions in DMA require you to upload files, create collections or groups, and schedule activities. Where this is the case, the pages will display the workflow at the top of the page as well as show you where you are in the workflow.
DMA components and application architecture
Whilst DMA does look quite different to the existing VQ Conference Manager – Meeting Scheduling & Management pages, the architecture of the VQCM platform is essentially unchanged. A new URL (https://servername.domain/dma/) has been added to the CM-Admin list to enable users to directly access DMA.
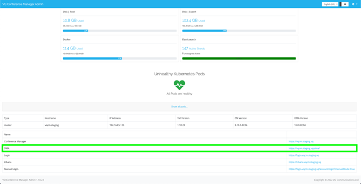
There are no additional servers to install or major configuration differences, other than the need to specify the user profiles and ACLs for access to the DMA functionality.
The End Point Agent (EPA) introduced in version 3.9.0 to deliver OBTP messages to Cisco video endpoints (Devices) has been expanded to ‘talk’ in more detail to devices using the Cisco Collaboration Endpoint Software API.
Setting up DMA
Profile and ACL use in DMA
As mentioned previously the access control features specifically for DMA functionality are not yet enabled. DMA is however an integrated ‘module’ of the VQ Conference Manger (VQCM) and as such requires a ‘non-personal’ user profile to access DMA using the ‘/dma’ URL.
System Service Account
DMA requires access to read from and write to Cisco devices (systems) at times during its operation and an account with ‘Admin’ level rights is required to do this. To align with security ‘good practice’ we recommend creating a dedicated account, the ‘Service Account’ to do this.
If you already have such an account in use in TMS (this is should not be the default ‘admin’ account with a changed password) we recommend using this same account to avoid having to make changes to your devices prior to migration.
Details of how to do this can be found in the VQ Conference Manager - Device Management and Automation (DMA) sections of this guide.
System Certificate
DMA requests ‘feedback’ from devices during its operation to obtain the data required to log and show device status, warnings, and alerts. To do this all devices must have the Conference Manager Trust Chain Certificate Authority loaded.
To load the certificate, navigate to the Certificate menu item on the Main Menu side-bar:
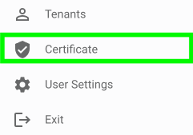
The Certificate page will appear and default to the ‘VIEW CERTIFICATE’ tab:
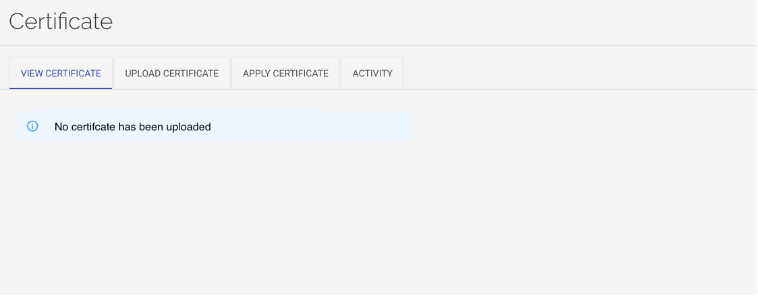
The ‘No certificate loaded’ warning will be displayed if no certificate has been uploaded to the system. To upload a certificate click on the ‘UPLOAD CERTIFICATE’ tab:
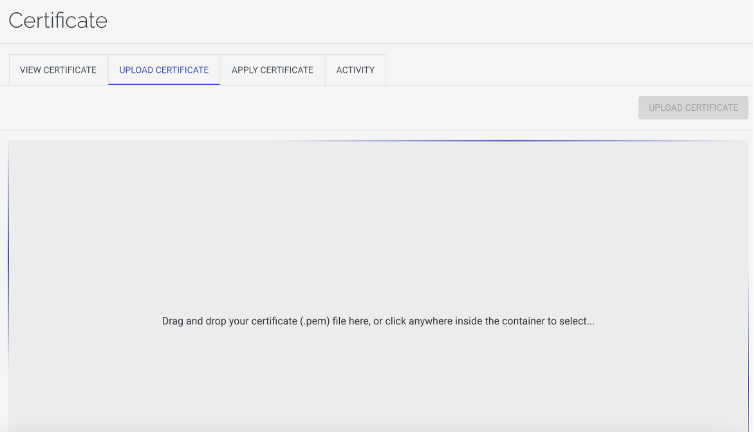
To upload the certificate (.pem) file drag and drop the file on to the highlighted box:
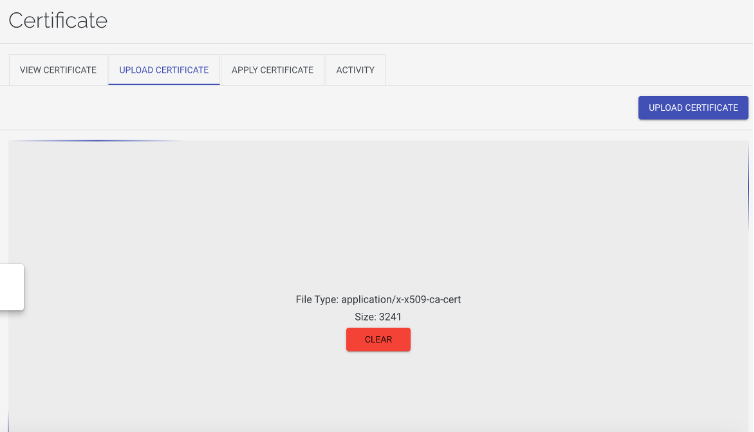
The upload screen will display details of the certificate and the UPLOAD CERFICATE will light up. Click to upload the certificate and the uploader will run and confirm success:
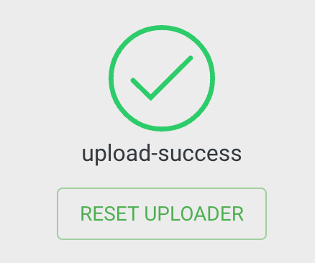
If the uploader fails, use the ‘Reset Uploader’ button to upload a new certificate. The certificate will be displayed in the View Certificate tab:

If the certificate is due to expire the menu will display an alert and the ‘View Certificate’ tab will also flag it:


DMA and the Tenant model
DMA has been designed to support the Tenant model of VQ Conference Manager. For each defined Tenant on a platform there is a separate DMA ‘container’; the devices of one Tenant cannot be seen or managed by the users (of any level) of another.


Users who require access to the devices of multiple Tenants can be permissioned to do so and must switch between Tenants using the link at the top of the DMA page to ‘Change Tenant’ and access the associated devices.
Importing data from TMS
Export/Import tooling and CSV importer
One of the greatest challenges faced when moving to a new management system of any kind is the migration of data in existing systems being replaced.
VQ has addressed this with DMA and is providing tooling where it is possible, to extract data from an existing TMS system*, transform it and load it into the DMA database.
In the initial releases of DMA, we are providing tools that can be run outside of the DMA platform to extract and load devices under management Phone Books and configuration templates from existing TMS systems.
* VQ recommends taking a copy/mirror of the TMS SQL database for migration use to avoid any risk of performance impact.
NOTE: A worked example of importing data from TMS is provided in the 'How to guide - TMS to DMA Migration '
Locations and Labels
Locations
To continue supporting the categorisation and organization of devices and contact lists (Address Books) in DMA as it has been in TMS, VQ has implemented a concept called ‘Locations’.
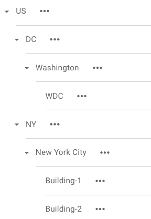
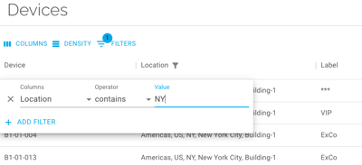
These Locations are intended to reflect the hierarchical ‘tree’ structure that TMS allows users to define in the Navigator function.
Labels
In addition to Locations DMA introduces a new concept not previously available in TMS, ‘Labels’.
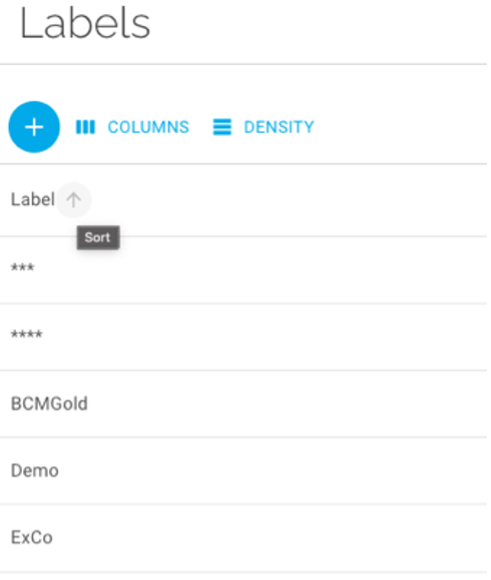
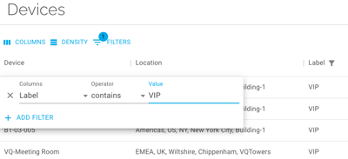
The Labels feature allows permissioned users to create and assign free text tags (Labels) to devices in the database enabling an additional level of categorisation and grouping of devices.
Devices
DMA Devices vs. TMS Navigator
The primary method for navigation of devices managed by DMA is through the Devices section of the side bar main menu:

One major change that users of TMS will notice is that DMA does not have an equivalent "tree view" to the Navigator function found at the top of the Systems menu:

As described in the previous section, DMA does have a concept of hierarchical classification with the Locations feature. Locations are described as a path rather than a tree. DMA also has an extended classification feature with Labels:

Using filtering and sorting this device list, a user can narrow down to a focused list of relevant devices, or even a single device. At the same time, they can see other devices of relevance and perform actions, view, edit and switch between devices quickly and easily.
Role of the Devices area
Prior to this final phase of the creation of the DMA suite there was no facility for a user to perform actions on a device in the Devices list. With Phase 4, DMA1.2 (as part of VQCM 3.12 and 4.2), Devices becomes the hub of all activities relating to the monitoring and maintenance of your collaboration devices.
In the planned future releases of DMA, most new capabilities will be added to the Devices area.
Important: DMA requests ‘feedback’ from devices during its operation to obtain the data required to log and show device status, warnings, and alerts. To do this all devices must have the Conference Manager Devices Trust Chain Certificate Authority loaded. If the certificate is not loaded onboarding of device will fail with a warning.
See System Certificate for more information.
Devices basics
In the Devices area of DMA, the default view has six columns showing the most critical information about the devices under management. These are:
Device – The name of the device recorded in the ‘System Unit Name’ setting of the device’s configuration.
IP Address – The (IPV4) network IP address of the device assigned manually or via DHCP.
Status – The latest recorded status of the device reported to DMA by the device using the HttpFeedback feature of Cisco CE/RoomOS or determined due to no received feedback.
Status values are Online, Online with Issues, In Call, Offline and Unknown. Details of the conditions resulting in these status indicators can be found in – VQ Conference Manager DMA - Device Status Alert Conditions.
Location – The ‘location’ of the device in the user-defined DMA Locations hierarchy (see Device Configuration Basics - Locations).
Label – The assigned user-define label[s] for the device. A device can have multiple labels assigned to it.
Action – Clicking the ellipses displayed in this column displays the menu of ‘maintenance’ actions available to the user.
Device Onboarding
Following on from any migration of device data from TMS, or as a new user of device management software it will be necessary to add new devices to the system.
The device onboarding feature of DMA is designed to manage this ‘provisioning’ and adding to the DMA database of new devices.
NOTE: if your environment is built using CUCM as the SIP registrar for devices, you will continue to provision devices using CUCM and import/sync devices to/with DMA for advanced management.
Add New Device[s]
In the Devices area of DMA click on the Add new button Icon  to open the Device Onboarding page:
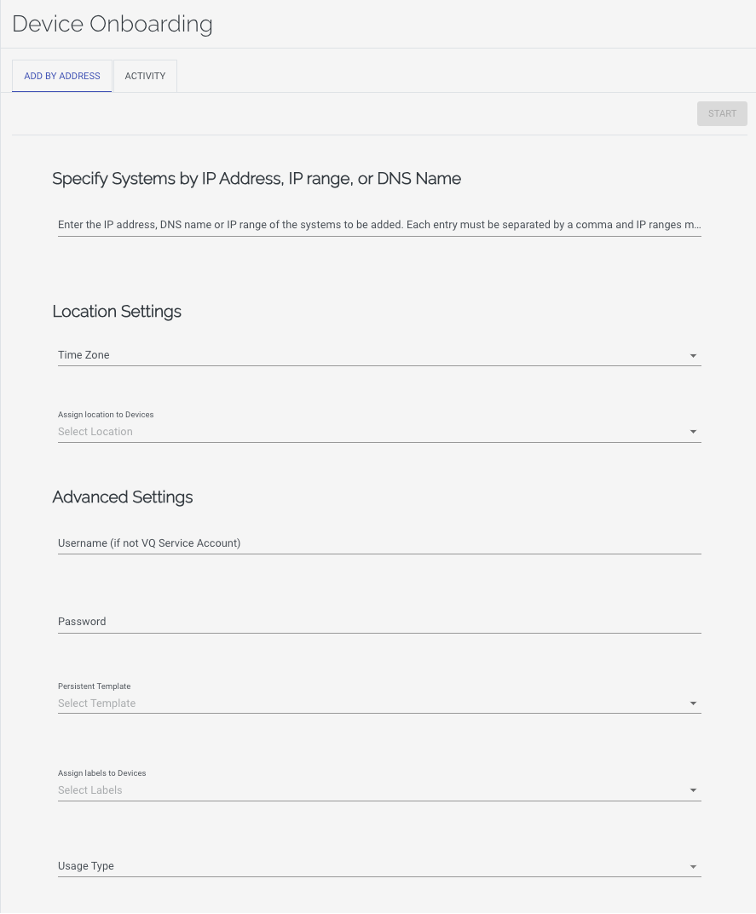
In the Device Onboarding page, you must now provide the IP address, DNS names or IP address range of the device[s] that you want to onboard to DMA:

There are three ways that devices can be identified to DMA for onboarding.
-
as individual IP addresses (separated by a comma [,] for multiple devices)
-
by their DNS name if this has been assigned
-
as an IP range (i.e., where a new group of devices has been installed and allocated sequential addresses from a defined range)
Once the target devices have been identified you must provide Locations settings; Time Zone and location within the ‘Location Hierarchy’ defined in DMA:

Time Zones are in UTC format and written to the device during the onboarding process, therefore when onboarding multiple devices they must all be in the same time zone.
Next, select the devices’ location in the DMA ‘Location Hierarchy’:
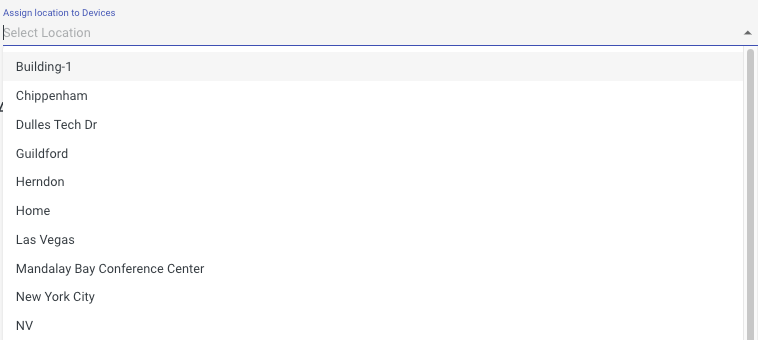
Once these basic setting are provided the user must move to the Advanced Settings section:
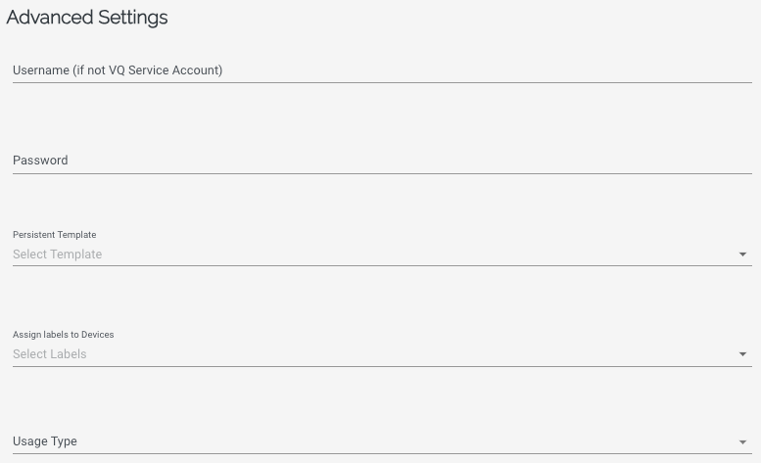
In Advanced Settings you will also find options for Username and Password. These are only ever required if the device[s] that are being onboarded have not yet had the VQCM Service Account added to them. See ‘Setting up DMA’ for details of the Service Account creation and use.

Additionally, you will find options to set:
-
Persistent Template – a configuration template applied on a scheduled basis to the device[s]. It is possible to set this later, if the devices that you are onboarding will not all use the same template
-
Labels – user defined labels (‘tags’) that provide additional filtering and grouping options within DMA
-
Usage Type – basic usage types for devices that can used to further filter and group devices for operational or analytical reasons
NOTE: There is only one field that is mandatory in Advanced Settings, the Usage Type.

To select a persistent template, label or usage type simply click on the drop down ( ) arrow.
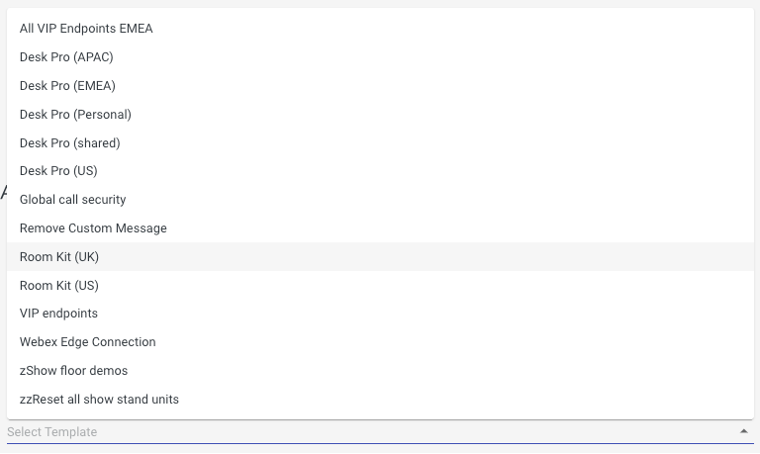
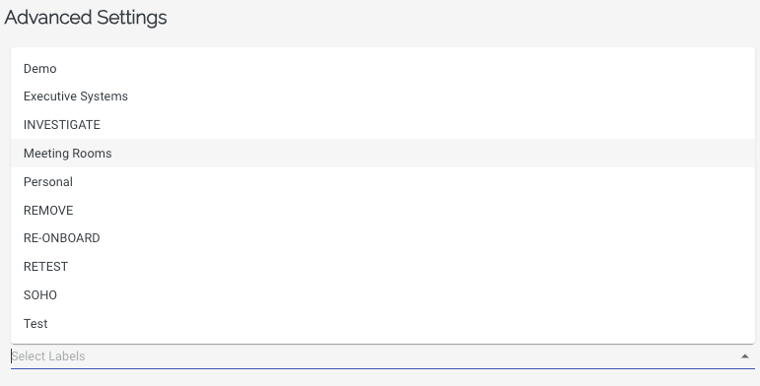
Multiple labels can be assigned to devices:

The Usage Type list is currently fixed in DMA. It is not editable :

Once all of the required fields have been set/selected and any additional settings populated the Start button  will be turn from grey to blue indicating that the onboarding process can be run.
Select Start and the onboarding request will be sent to the server to be added to the queue:

The Device Onboarding page will now be switched to the ACTIVITY tab to display progress and success/failure messages for the request:

As the onboarding process progresses the activities for each device specified will be displayed. In addition, a summary message line will be displayed showing overall request status.
Successful:
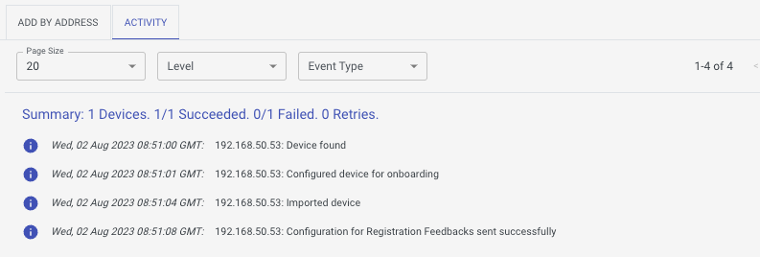
Failed:

In the event of a failure to onboard the Activity tab will provide more information as to what went wrong (e.g., device not found, could not login to device etc.) to guide the user towards resolution.
Once onboarding is completed successfully the device will appear in the Devices list and show its status:

NOTE: If you are running a CUCM controlled environment and are not importing devices from TMS, it is recommended that you use the DMA CUCM Connector.
The Connector creates a link from DMA to your CUCM cluster[s] and ‘pulls’ the details of video device found into the DMA database. It will the synchronize the database with CUCM as devices are added to or removed from the environment. If you have imported your devices from TMS, then DMA will link them to the same devices if found in CUCM while retaining a hierarchy (folder) placement that might have been imported, or labelling performed.
Device Location and Labels
From the main Devices page, it is possible to make DMA data configuration changes to a device or devices, i.e., the ‘Location’ and ‘Labels’ values stored against them.
Location
To set or change the Location (position in the ‘location hierarchy’ of DMA) of a device or devices select using the left-hand side check boxes:

The Location and Labels buttons in the page top menu bar will light up:

Click on the Location button to set/change the location of the device:
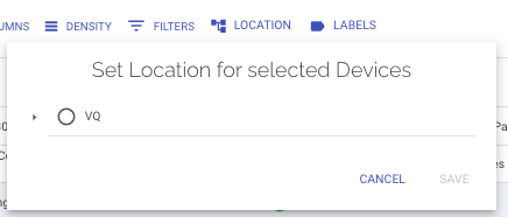
The location hierarchy can be expanded to find the new location to be set on the device:
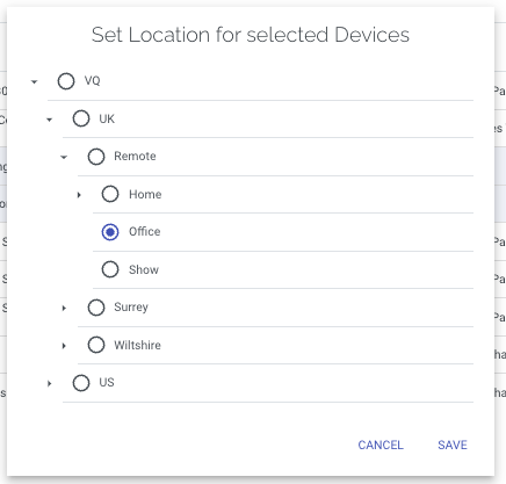
Click ‘Save’ and the device records will be updated:


Labels
To set or change the Labels assigned to a device or devices, follow the process above but in this instance select the Labels button:
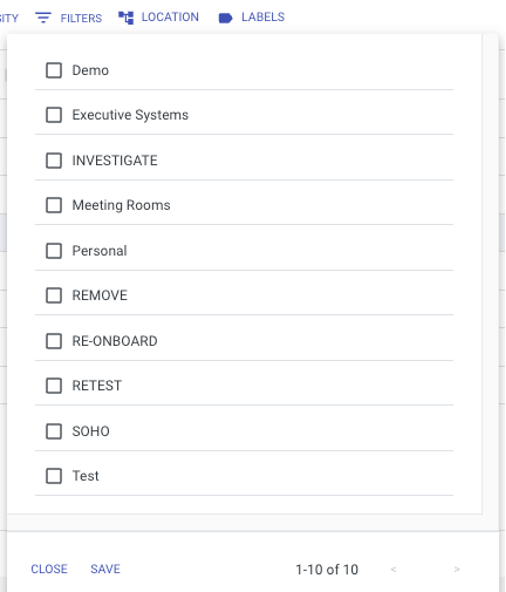
Select the required Label[s] and click Save to write these labels to the device[s]:
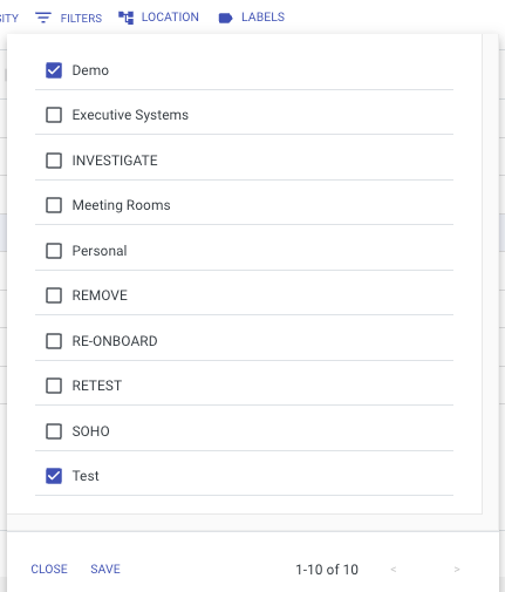
Click Save and Close and the device will now be update and the labels displayed in the Devices page:

Device Actions
To perform troubleshooting, testing, or fast settings changes to a device the DMA Devices page provides several different device actions or functions via the Action menu:
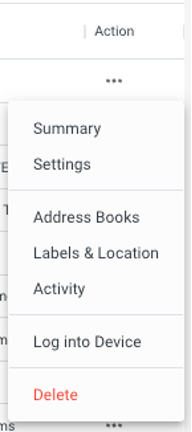
To access the available actions, click on the three dots ( ) in the ‘Action’ column for any device. The menu currently has seven options available.
Summary
This action opens a page displaying key information about the selected device such as, status detail, warning/alerts, system contact details and SIP registration.
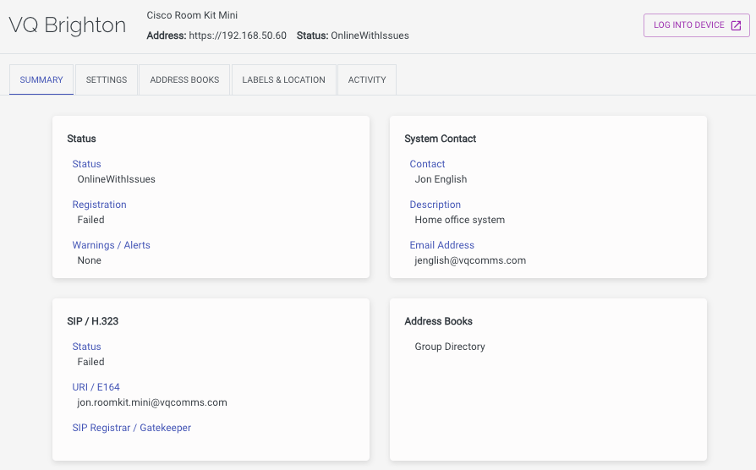
You will notice that the page provides access to the other actions of the menu via tabs near the top of the page. It also provides a quick launch to access the web interface of the device in a new browser tab.
Settings
This page/tab displays more detailed configuration about the device and allows the user to edit various common settings that are useful when troubleshooting or re-configuring and device:
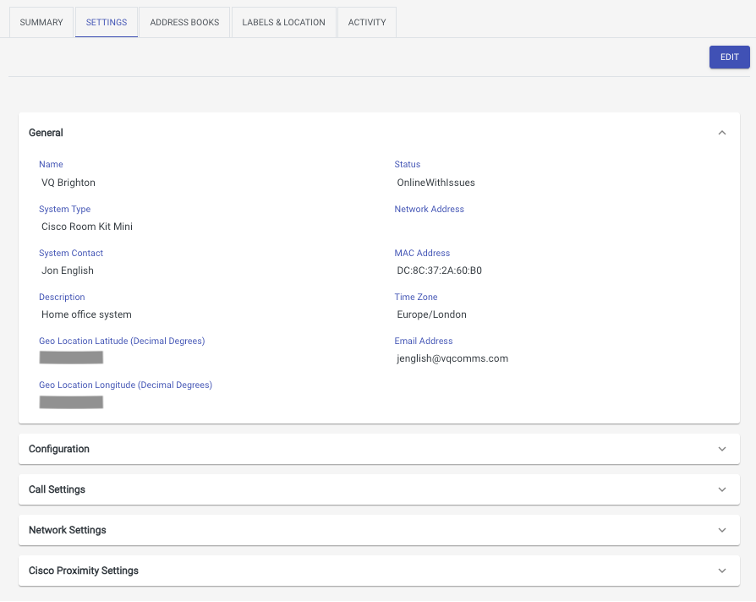
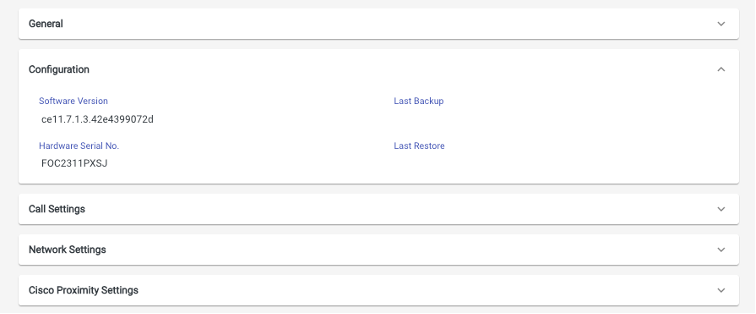
The Settings are grouped to enable faster locating of a setting and to allow the user to ‘declutter’ the view. Using the arrow on the far right of each section it is possible to expand or collapse the sections:
To edit a setting on the device the page/tab must be put into edit mode by clicking on the  button.
The device is now in edit mode.
NOTE: any changes made here will be written to the device directly and immediately on ‘Save’.
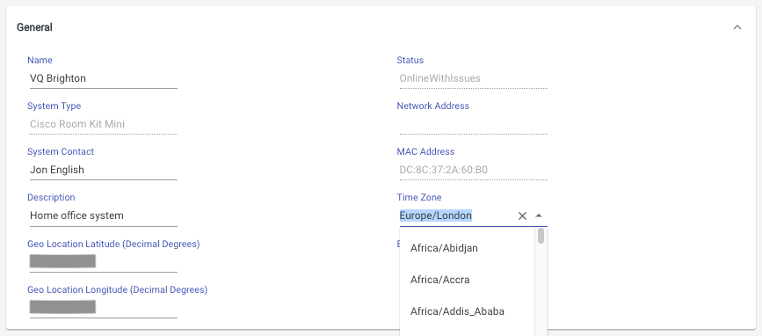
The editable settings are now made ‘open’ to edit and can be changed via free text entry (items such as IP address formatting will be validated on save) or drop-down list selection. Once a change has been made the Save button will be lit:

If you do not wish to commit the changes to the device press Cancel and the changes will be ignored, and the device page will be taken out of edit mode and the displayed settings will revert to their pre-edit values.
NOTE: A new feature is available in DMA that allows users to store the geographical location of a device in its settings. This ‘geo-location’ is used by the DMA Dashboard in the Analytics module to display the device on a world map. Further information about how to obtain and use the geo-location data for a device is described in VQ Conference Manager DMA - Geolocation
For details of the settings and what effect they will have the device operation of performance please refer to the Cisco administrator, setup, or user guide for the device. DMA will not warn you of any detrimental effects to operation or performance that a change might have.
Address Books
This page/tab enables the user to assign to, or unassign address books from devices. No changes are made to devices by this feature, it simply manages device access to address books and whether they will be made searchable by the device:
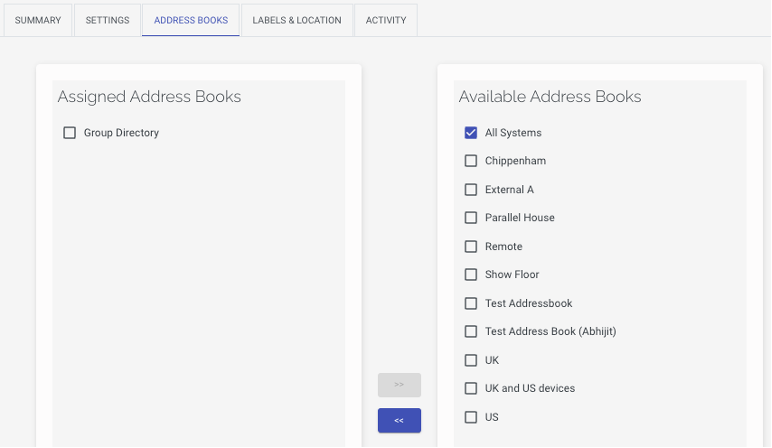
Simply select the Address Book[s] that you want available to the device and click the ‘<<’ or ‘>>’ buttons to either assign or remove access:

Labels & Locations
This page/tab enables the user to assign to, or unassign labels from devices, or set the Location of the device in the DMA hierarchy. No changes are made to devices by this feature, it simply writes the selected labels to the DMA database entry for the device:
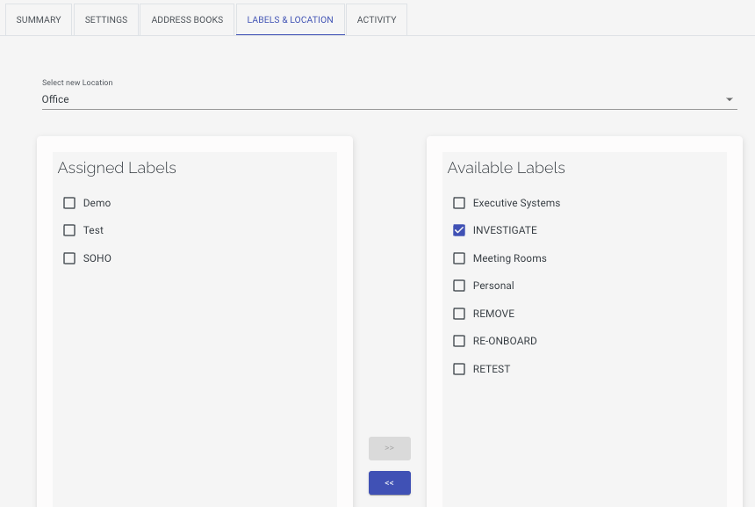
Select the labels to be assigned to/removed from the device and use the ‘<<’ or ‘>>’ buttons to assign or remove:

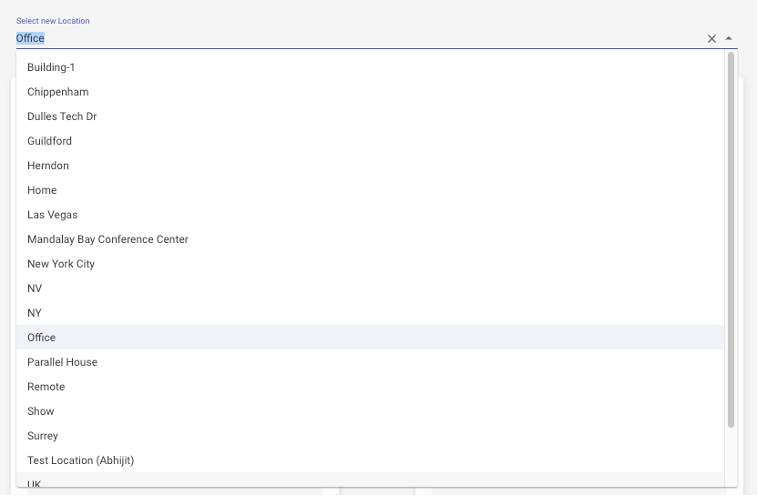
Location is set at the top of this page using a drop-down menu:
Activity
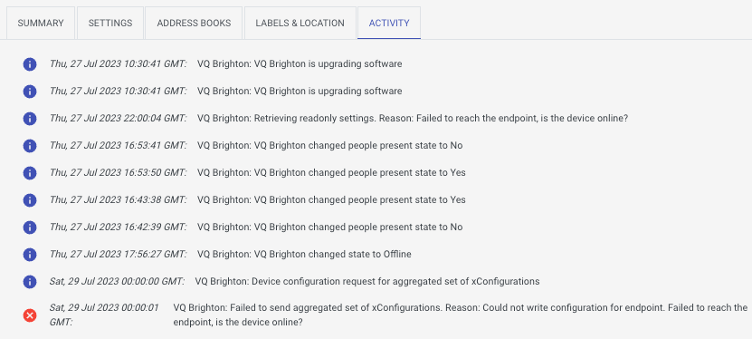
The Activity page/tab enables a user to view all of the device feedback activity received from the device. This is not the DMA activity on the device but what the device has been requested to provide to DMA via the HttpFeedback feature of the Cisco collaboration devices ‘xAPI’:
Log into Device
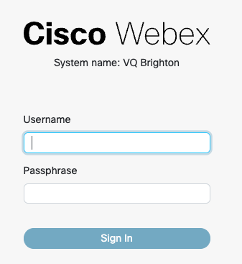
This menu option launches the web interface of the device in a new browser tab:
Delete
This menu option deletes the device from the DMA database and de-registers any status feedback requests made to it using HttpFeedback:

To complete the deletion, process the user must type the word ‘DELETE’ into the pop-up and click Continue.
NOTE: The process will immediately remove the device from the DMA database.
CUCM Connector
DMA v1.3 introduced a new function for environments using Cisco Unified Communications Manager (CUCM, aka ‘Call Manager’) to provision devices and provide SIP registration/call setup. The DMA ‘CUCM Connector’ enables the use of CUCM as the ‘golden source’ of device data, while bringing all the capabilities for monitoring and managing devices to the environment.
DMA does not replace CUCM in this setup (as it does TMS) but instead brings more visibility and control to video devices.
NOTE: DMA does not write any information back to CUCM. It is assumed that CUCM is configured for devices to be managed by an ‘external manager’, allowing changes that are made on the device (not by CUCM) to be reflected in CUCM.
Create a new connection
It is possible for DMA to connect to multiple CUCM clusters within an environment and to add the video devices found to the DMA database.
NOTE: Multiple connections to the same cluster are not recommended as this will cause synchronization conflicts:
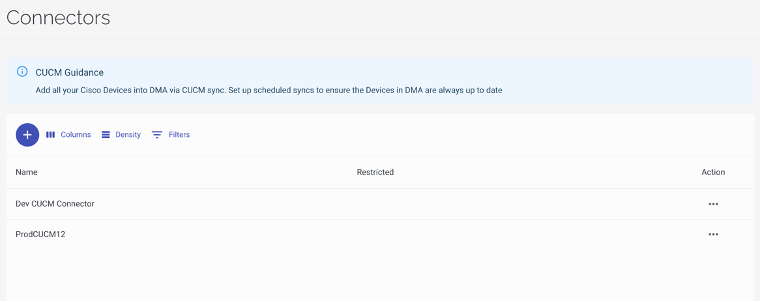
To add a new CUCM connection to DMA, click the Add new button ( )to open the Create CUCM Connector page:
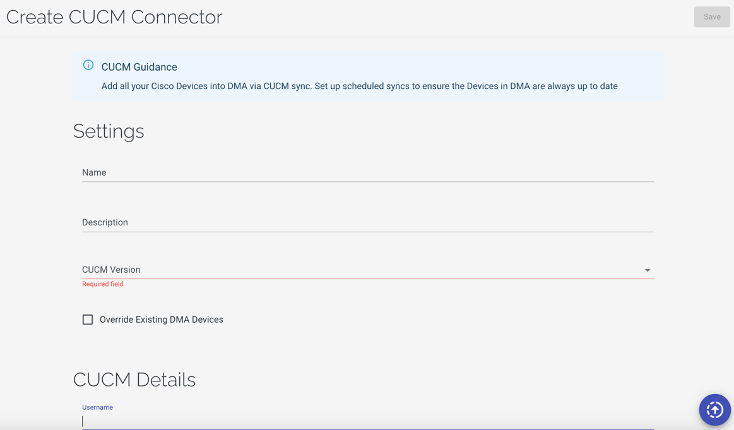
In the Settings section, enter a name for the connection being created and a description of it. Next select the version of CUCM that is running on the cluster being connected:

With every CUCM release the API is updated, and DMA will use the specified API version when communicating with the cluster.
The Override Existing DMA Devices should only be checked if you are happy that any devices already in DMA that are also found in CUCM should now be managed as CUCM synchronized devices.
NOTE: A CUCM will support the previous API as well as its own version, e.g. CUCM v15 will support the v14 API but CUCM v14 will not support the v11 API.
Next the CUCM Details should be filled in. This section is for providing the username and password that has been permissioned for API connectivity. The URL for API communications with the CUCM is also required:

In the Device Settings section, you should provide the credentials of the admin enabled account that will be used to communicate with the device during onboarding. The DMA Service Account details will be added to the device during onboarding:

NOTE: If the devices have already been configured with the DMA Service Account details this is not required.
Finally, the Scheduler section should be filled in to set the frequency (Daily/Weekly) of the synchronization and the time that the synchronization should occur:
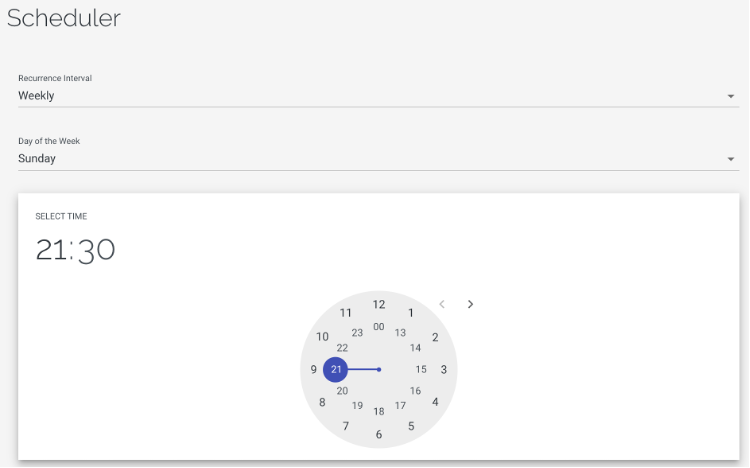
NOTE: The API connection account, frequency and timing of the synchronization operation should be discussed with you CUCM administrator.
See also CUCM Connector Configuration
Directory Services
Directory Services (DS) basics
Data Sources
Data sources are basis of any Address Book that is to be created in and made available by DMA Directory Services to the video endpoint devices in your environment. The first and most important data source for DMA is its own list of devices under management, your organizations own devices. This source is predefined in DMA and named ‘Internal DMA’ by default.
Address Books (Phone Books)
DMA supports the creation of Address Books from the Internal DMA devices list, sub-sets (using filters) of the Internal DMA list or imported data from pre-formatted CSV files.
DMA Address Books are designed to replicate the TMS ‘Corporate Directory’ Phone Book. They are created primarily from the DMA managed device list and are made searchable to assigned video endpoints via the same SOAP XML API method used by TMS.
DMA Address Books can be accessed by endpoints that have been set to ‘TMS mode’ in Phone Books and have the URL set to point at the VQ Conference Manager server’s DMA Directory Service (https://servername.domain/api/v1/dma/tmsaddressbooks/PhoneBookService.asmx). The Address Books are secured to be accessed only by ‘Assigned’ (permissioned) groups of devices in the same way they are in TMS through the ‘Set on Systems’ command.
In addition to replicating the method of querying/searching the Address Books DMA supports the presentation of the results based upon the hierarchy defined using the Locations feature.
Creating an Address Book
To create an Address Book, you must first have a Data Source to connect it to. This will have been done in DMA either by importing the devices from TMS or importing from a CSV file using the CSV Import Tool available from VQ.
Step 1.
Select the Address Book feature from the side bar menu

Create a new Address Book by clicking the ‘Add New’ button  at the top of the page

Select the Data Source that will be used to create this Address Book
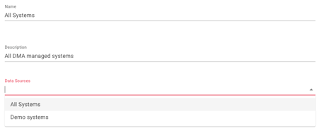
Save the Address Book

The Address Book list will now show the address book.
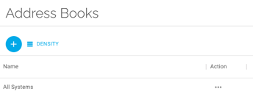
Step 2.
While still in the Address Book, select the ‘Assign to Devices’ tab

Click the ‘Add Filter’ button to begin creating a list of target devices

Using the filter creation box build your list of devices to be assigned the Address Book
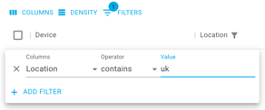
Once you’re happy with the list, check the boxes of the systems to be assigned the address book (the top box selects all devices shown on the current page) click the ‘Assign’ button to make the Address Book available to the selected endpoint devices


Assigning Address Books to endpoints
To provide access to an Address Book from a video endpoint device or group of devices use the ‘Assign’ action.
Select Address Books from the side bar menu

Locate the Address Book to be assigned to and click on the ‘Action’ button

Select ‘Assign to Devices’ from the drop-down menu to enter the Address Book assignment tab

Once in the Assign to Devices page click the ‘Add Filter’ button

Using the filter creation box build your list of devices to be assigned the Address Book
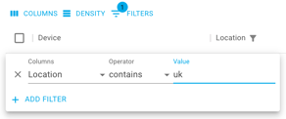
Once you’re happy with the list, check the boxes of the systems to be assigned the address book (the top box selects all devices shown on the current page) click the ‘Assign’ button to make the Address Book available to the selected endpoint devices|:


Working with Data Sources
If you want to use a sub-set of the DMA Internal Device list to create an address book to be used by specific devices, then you will need to create a new Data Source. This new source can be filtered to contain only the devices you wish to appear as contacts in it.
Select the Data Sources option on the side menu bar:

Select the ‘Add New’ button at the top of the page:
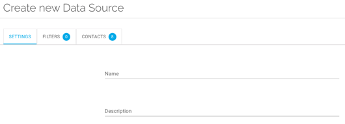
Give the new Data Source a name that describes the devices that you are going to filter into this new source, e.g., ‘UK Systems’:

Create a filter that selects only the devices that you want in the final Address Book, e.g., ‘Location - Equals - UK’:

Confirm that the endpoints you are expecting to see are now selected and Save the data source:
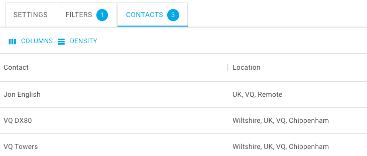
NOTE: In the initial releases of DMA there is only one Data Source available, the Internal DMA device database. This can be created from imported TMS device data or using a specially formatted CSV file.
Future releases will include Data Sources that have been created by connecting to external sources of data such as CUCM, Active Directory or LDAP.
Device Configuration
Device Configuration is where detailed configuration managment of Cisco collaboration devices can be performed using pre-defined Templates and Cisco xAPI commands. It is also where DMA can be provided with reference information that will be used to configure the details of devices in the DMA database.
In the initial releases of DMA the Locations of devices are extracted from the TMS database and are not directly editable in DMA. In a similar way Labels are also not currently editable in DMA and of course, will not have been extracted from TMS as it doesn’t support them. There are however ways of bringing devices into DMA with Locations and Labels assigned using our CSV import features. This might be worth experimenting with in your lab environment.
Device Configuration Basics
IMPORTANT: Device Templates was a new menu item in VQCM 3.11 (DMA 1.1) and we recommend that you read VQ Conference Manager DMA - Device Templates and Template Modules’ before using the features outlined below.
Device Templates in DMA are the equivalent of the ‘Configuration Templates’ function found in the ‘Systems’ section of TMS. The primary use case for Device Templates is to ensure that standard configurations are applied to all endpoints in the environment. This ensures that critical security, performance, and capability settings are maintained.
Before creating templates, you will need to create one or more Template Modules containing the commands or configuration settings that are to be sent to the collaboration device.
Template Modules
Template Modules are a new concept unique to DMA that we have introduced with the aim to reduce the amount of work required to create, manage, and change configurations in large environments.
To begin creating modules in DMA, select the Template Modules menu item on the side bar menu:

Step 1.
Create and new module by clicking the ‘Add New’ button at the top of the page

In the Settings tab, give the module a name and description:
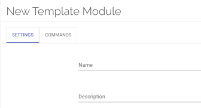
Step 2.
Select the Commands tab to begin adding the required xAPI configurations and commands to the module
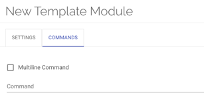
Add commands to the module one at a time either by typing directly into the field or by copying and pasting from the xAPI reference guide:

Click ADD to write the command to the module:


To add a multiline command, tick the Multiline Command check box to activate the multiline command entry box:

Type or paste the command text into the entry box.
NOTE: You must ensure that the last line is followed by a new line with a period (fullstop) followed by another new (blank) line.

Step 3.
Once all the required commands have been added to the module you can return to the Settings tab to ‘Enable’ the module ready for use in a template:


You must click  to save the commands and settings to the module.
Alternatively, you can click  to store the module and return directly to the Template Modules page.
Note that if you do this the module will be created but be in a disabled state until the ‘Enable’ switch is set:

NOTE: DMA provides a direct link to the online Cisco xAPI resource website  . If you are not able to access this internet resource, then PDF versions of the guide can be downloaded from here: https://www.cisco.com/c/en/us/support/collaboration-endpoints/spark-room-kit-series/products-command-reference-list.html
Device Templates
Device Templates in DMA are constructed of; template modules (containing the required commands or configurations settings), a list of devices that the template must be applied to and, if ‘persistent’ (i.e., to be re-applied regularly to the devices), have details of when this should be done.
Step 1.
Create a new Template by clicking the ‘Add New’ button at the top of the page:

The Template must be given a name and at least one template module must be selected for the Template to save:

Select the module[s] to be included in the Template using the drop-down menu:
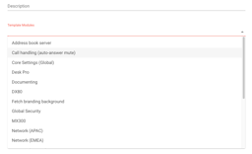
The selected modules will be displayed in the field showing their status:

A  symbol indicates that the module is enabled, and its settings will be included in the Template at run/send time. A
  symbol indicates that the module is currently disabled and will not be included at run/send time.
NOTE: The Template can be sent to devices in this state, but disabled modules will be ignored until enabled in the Template Modules area.
Step 2. (optional)
If the Template is to be resent on a regular schedule to devices i.e., it is ‘Persistent’ then the Persistent check box must be ticked.
NOTE: Devices can only be assigned one persistent Template in DMA to avoid potential conflicting settings be sent at different times to aTtemplate. However, it is still possible to send ‘one time’ settings to a device using a non-persistentTemplate:

The page will automatically display the Apply Time selector to begin setting time, recurrence interval, and day of week:
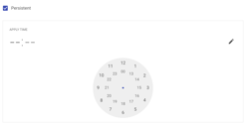


Once the time, recurrence and day are set the template can be saved.
NOTE: Persistent templates can be identified by the  ‘chip’ displayed on pages or in lists against the Template name.
Step 3.
Once saved you will be sent back to the Device Templates page ready to begin selecting the devices that the Template will be sent to:

Locate the Template that has just been created and click on the Action ‘dots’ to display the Action menu:

Select Add To Group on the Template action page to add target devices which will be displayed:

NOTE: The Template action page will alert the user to any disabled modules that will be ignored at run/send time and provide a link to identify them:

To begin adding devices to the group a filter  is required to identify the required endpoints from the DMA database of devices. Click the Filters icon and the filter builder dialogue will be displayed:

Build your filter using the options presented:
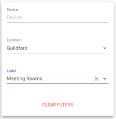
The in-scope devices will be displayed on the main page. Click outside of the filter builder to see them:
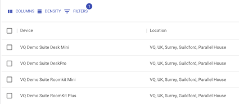
Select the devices to be included in the group by either clicking the All displayed items check box, or the devices individually if not all of them are required:

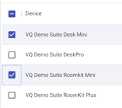
Once your selection is made click the ADD button to add the device to the Template group:

And confirm the action:

DMA will confirm that the group has been successfully created:

The devices will now be displayed in the VIEW GROUP tab:

NOTE: To remove devices, click the REMOVE FROM GROUP tab and repeat the above process of filtering and selecting devices:

Step 4. (optional)
Having created a Template and adding devices to the group you may want to send it to those devices rather than waiting for the scheduled time. Alternatively, if the Template is not persistent then it will need to be sent manually to devices using this process.
Select the SEND NOW tab:

Select the devices from the group that you want to send the Template to:

And click the SEND button to execute and confirm the send action:


You will be automatically taken to the ACTIVITY tab where the status of the send action will be displayed. On completion of the send a summary of the send action results will be displayed:
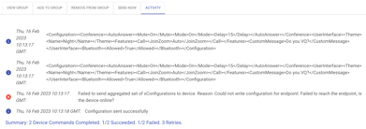
In this example one device was sent the Template successfully and one failed after three retries. The failure message will identify that device that failed and provide some explanation/possible reason for the failure.
The Template send routine of DMA doesn’t currently check if an endpoint is currently in a call when sending, this will be added in a future update.
Locations
Locations in DMA can be equated to the hierarchy that was previously created in TMS using the Navigator function. The primary use case for Locations is essentially as a categorisation and filing system for your devices.
Typically organizations use location hierarchies that describe the physical and geographic locations of devices, e.g., regions, countries, states, and cities. But they might also use an organisational design that allows for clear identification of who owns a device or what it is used for, possibly in an environment where devices are not stationary.
To begin building out or adding to your hierarchy select the Locations feature from the side bar menu:

Click on the ‘Add New’ button  at the top of the page to create a new top level ‘node’.
If you want to add a new ‘child’ node to an existing branch, click on the ‘Action’ dots at end of the chosen ‘parent’ node. You will be presented with a drop-down list of available actions:
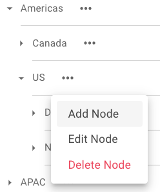
Click ‘Add Node’ and you will be given a box to name the new node:

Name the new and click 'Done' to save this new node in the hierarchy.
The same operation can be used to edit an existing node, or to delete a node that is no longer in use.
Please note that to delete a node it must first be empty of other nodes and devices.
Labels
In DMA we have introduced, and new concept not seen in TMS but often seen in more modern workflow applications, Labels.
Labels are additional free text ‘tags’ that can be added to devices enabling additional groupings and identification when filtering devices for actions. In our examples we show one of the most common use cases (there are plenty of others we’re sure) we have seen…tagging ‘VIP’ devices.
Certificate Management
DMA certificate management is designed to reduce the time and skills required to deploy and manage device certificates at scale. Without DMA, certificates must be deployed individually to each device using the local Web interface or complex scripting.
DMA Certificate Management supports the ‘Service’ and ‘Custom’ categories of certificates on Cisco collaboration devices.

Above. The Security page of a device’s web interface.
While this feature simplifies deploying and managing certificates, it is strongly recommended that users of the feature have a sufficiently deep understanding of certificates and how they are used/deployed on Cisco collaboration devices.
Please read Certificate Management before using this feature.
Certificate Management is found in the Device Configuration section of the sidebar main menu:

NOTE:The previous ‘Certificate’ menu item for managing the VQCM server certificate required by devices to allow DMA services access to them has been moved. It has been relocated to the bottom of the side menu bar and renamed ‘Server Certificate’.
On entering the Certificate Management page, you will be presented with three tabs: Certificates, Collections, Deployments, and Renewals:

In addition to the tabs, some vital information is given about the certificate types supported (Service and Custom) and their usage across single or multiple devices.
Certificates
The Certificates tab displays all the certificates uploaded to DMA and available to be added and deployed to collections:

This view is expected to become very full quickly due to the sheer number of certificates likely to be used in your environment. Due to this, the view has comprehensive filtering options to refine the list displayed quickly:

The list can be filtered on one or more of these criteria:
• Name
• Certificate Type – The device ‘service’ types: Audit/Certificate Authority/HTTPS/HTTPS Client/HTTPS Proxy/Pairing/SIP/802.1x
• Certificate Expired – Valid/Expired
• Certificate Categories – Custom/Service
• Subject Name - Common Name/Organizational Unit/Development Organization/Locale/State or Province/Country code
• Issuer Name - As above but for the certificate in the chain that signed the current certificate
• Valid From/Valid To – The creation and expiry dates of the certificate


Once applied, the page will display only those certificates matching the filter:

For displayed certificates it also possible to perform several actions. The certificate settings can be changed for the ‘services’ it applied to on devices:

It can also be viewed or deleted:

Upload Certificates
To upload a new certificate, click the ‘Add New’  button at the top of the page, the Upload Certificate page will open. The Upload Certificate page has two tabs, Single Upload and Bulk Upload.
We will discuss a single certificate upload first.

On the Upload Certificate page, you must select the category for the certificate to be uploaded, give it a name and description, and choose the services it will apply to on the device:

Select Service or Custom depending on the type of certificate to be uploaded.
NOTE: The information panel above the selection radio buttons explains what service certificates and custom certificates are.
Next, give the certificate a name, description, and passphrase. If a name isn’t provided, the system will use the file name of the uploaded certificate .pem file:

Once named, the services (if a Service certificate) the device will be applied to must be selected:

This certificate will be used for SIP server connection.
Finally, the certificate must be uploaded to DMA. To do this, either click on the Certificate upload container, or drag and drop the file from your operating system file browser:

If the private key isn’t contained in the certificate, select it or drag it and drop it in the right-hand Private Key container. Click Save and the upload will start, with status being displayed in the uploader widget:

Uploading a Custom certificate follows the same process except that the Settings screen is simplified with less information being required about the certificate:

Bulk Uploads of certificates are performed similarly to single certificates but require a .ZIP file containing the certificates and a ‘manifest’ file describing them:

A template of the manifest files can be downloaded from the Bulk Uploads page:


Manifest files are .CSV files and can be edited using a regular text editor or other tools such as Excel:


Zip the .pem certificate files and the .csv manifest files into a single .zip file and upload it to DMA using the same method as with a single certificate:

The file will be uploaded unzipped, and the certificates will be loaded to DMA using the manifest:


Build Collections
Certificate collections are used in DMA to group certificates uploaded and stored on the server ready to be deployed to a device or devices in your environment:

To create a new collection, click the ‘Add New’  button at the top; the Create Certificate Collection page will open:

Next, click the Next: Certificates button to move to the Certificates page, where you can begin adding certificates to the collection:

To select the certificates to be added to the collection, click the Add Filters button. This will open the filter list where you can apply filter criteria to build the list of certificates to be included:

Once you have a list of certificates, select (check) those to be included in the collection:

Click Finish to build the collection and return to the Collections tab:

The new collection will appear in the list and be ready for deployment(s) or further editing if required.
Certificate Deployments
To build a certificate deployment job, navigate to the Deployments tab in Certificate Management:

Here, you will find a list of existing deployments and details of when they were run and their status:

To create a new deployment, click the ‘Add New’  button at the top; the Create Certificate Deployment page will open:

Enter a name and description for your deployment, taking note of the guidance about not mixing collection types in a deployment.
NOTE: It is essential that you fully understand the differences between One to One, One to Many Service, and Custom certificate collections. See ‘ Certificate Management’ for more information.
Having named the deployment, you are ready to select the collection(s) to be deployed. Again, remember that you must be consistent in the collection types and destination (devices) of the certificates being deployed:

After selecting the collection(s) to be deployed, you can also set the Force Deployment option. This option ensures that DMA deploys certificates to online devices even if they are showing issues. The issue could well be that the certificates are due to expire or expired.
Next, click the Next: Devices button to move to the next step in the deployment creation process. You will be taken to the next page, where filters can create a list of devices to deploy:

Build your filter and select (check) the devices to deploy:

Once the devices have been selected, click the Next: Schedule button to move to the final step in building your deployment:

Select the deployment window open and close dates and times, and click the Finish button  to save the deployment.

The deployment will display in the list with a scheduled icon to indicate its current status. You can select Deploy Now from the Action menu if you wish to set off the deployment immediately.

The status indicators in the deployment list will assist with troubleshooting and maintaining the list, i.e., deleting completed deployment. For a deployment that has failed or is completed with issues, view the Activity tab for more information about the cause.

If a deployment fails due to offline devices, you can edit it to remove the successfully deployed devices and set a new deployment window for completion of the outstanding ones.
Certificate Renewals
The DMA Certificate Renewals is designed to ease some of the most complex and time-consuming aspects of the renewals process. The Certificate Renewals process in DMA has three steps:
1. Identify and link certificates to a Renewal
2. Download the certificates and renewal template/manifest
3. Upload the renewed certificates and deploy them to the origin devices
NOTE: The certificate renewal process between steps two and three will differ across organizations and is assumed to take place completely outside of DMA.

To begin, create a Certificate Renewal ‘job’ by clicking the ‘Add New’  button at the top of the page.

On the Certificate Renewal Settings page, the user can provide a renewal name, description, and select whether the deployment of the new certificates should be forced (to devices showing online with issues) and/or restarted following deployment:

Next, link the certificates you wish to renew to the Certificate Renewal. Click the ‘Next: Link Certificates’  button to move to the next step in the workflow:

A Filter should be used to return the required certificates that can then be selected using the check boxes displayed. It is possible to select certificates individually or as a complete list:

The filter can be created by using one or more of the certificates attributes, Name, Category, Valid From, Valid Too and Collection Type. To complete the selection step, add the certificates to the renewal and move to the next step, click on the ‘Next: Link Certificates’  button.
NOTE: Once Certificates have been added you cannot make additions or removals
The Download & Upload page (below) of the Certificate Renewal workflow has unsurprisingly, two functions. This page is where you can download the certificates for renewal and upload the renewed certificates for deployment back to the origin devices:

To download the certificates selected in the previous step and the certificate mapping file required for re-deployment, click on the ‘Download Renewal Zip Template’ button and save the file to the desired location for use in the external certificate renewal/re-signing process:


The downloaded .ZIP file will contain the certificates selected during the first step and a .CSV file containing the mapping information that will be used when re-deploying the renewed certificates.
NOTE: This file is essential to the redeployment stage and will need to be redownloaded if lost.

You can exit the Certificate Renewal workflow at this point and return to it later when you have the renewed certificates.

Now that you have obtained your new/renewed certificates you can replace the old certificates with your new ones making sure to map the correct file names to the generated Unique Identifiers (GUID):

These GUID's allow VQ to map your new Certificate to the old one. From here we know what Devices the old Certificate was on and therefore we can automatically replace them:

In our example (above) you will notice that the certificate file (.pem) names have changed and we have therefore reflected this change in the .CSV mapping file that will be in the .ZIP file to be uploaded:

NOTE: the .ZIP file must have the same name as the original downloaded file to be uploaded back into DMA.
To upload the renewed certificates .ZIP file and schedule the deployment of the new certificates, return to the Certificate Renewals page and select the Finish Renewal Setup action for the renewal:

On the Certificate Renewal page, you should now drag and drop or click and select your .ZIP file containing new certificates (and the mapping file) for upload:

Upload the file and click on the ‘Next: Schedule’  button to move to the next stage in the workflow:

As with other workflows in DMA, Certificate Renewal deployments use the ‘deployment window’ method of scheduling. The user must select open and close dates/times for the deployment to take place allowing for the likely disruption to service operation of the devices involved.

When a Certificate has been successfully renewed on all the Devices it exists on, we will remove the certificate from the renewal group and the certificates list, replacing it with the new Certificate:

In the event some certificates fail to renew due to devices being in a call or offline etc:

You can keep retrying the renewal until it has completed successfully:

Once the renewal has completed successfully on all mapped devices it is not automatically deleted but can be deleted using the Action menu:

Please refer to Certificate Management for more information about certificates on Cisco devices.
Firmware & Macros
DMA's Firmware & Macros function section allows users to upload and deploy device RoomOS images and macros to their devices. Both functions require uploading externally sourced files and scheduling of deployment due to the need to perform system reboots. The firmware & macro tools support the definition of ‘deployment windows’ (of time), enabling users to ensure that disruptive actions do not occur during operating hours.
Firmware Management
DMA Firmware Management is designed to enable the upgrading of Cisco Collaboration devices using RoomOS firmware images downloaded from Cisco Software Central. These ‘on-prem’ versions of RoomOS are unavailable through Webex Control Hub and require a service contract login to download.
The Firmware functions of DMA are accessed via the Firmware section of the side menu bar:

File Library is where RoomOS image files uploaded to DMA will be displayed and limited management of them performed. For full management of these files (renaming, descriptions etc.), DMA File Server should be used:

NOTE: File Server is described in full in the section Applications > File Server
Firmware Deployment is used to create deployment ‘jobs’ that can be configured for specified groups of devices and scheduled for agreed change widows inside of your change control process:

The Firmware Deployment window displays all deployment jobs that have been created and shows details of the deployment window and the status of the job; Scheduled, In Progress, Completed Successfully, Completed with Issues, and Failed.
To create a new deployment job, click on the Add New button ( ) and the Create new Deployment window will open:

Give the deployment job a name and description and select the firmware image that is to be used:

NOTE: By default, DMA will not attempt to deploy to devices that are showing as ‘Online with Issues’. If you want this firmware deployment to upgrade devices that are reporting issues, then you should check the ‘Force Deployment’ tick box:

Next set the date and time of deployment window for the deployment based on the change window that has been agreed for the device downtime:

DMA will begin deployment as the windows and will not start any new deployments after the Window Close, but any running deployments will continue until completion.
You now need to identify the device or group of devices that this deployment will target using the Add to Group action:
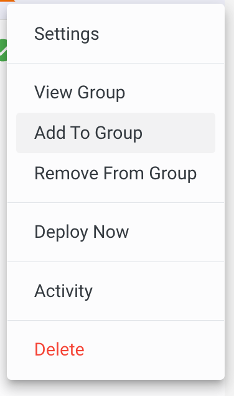
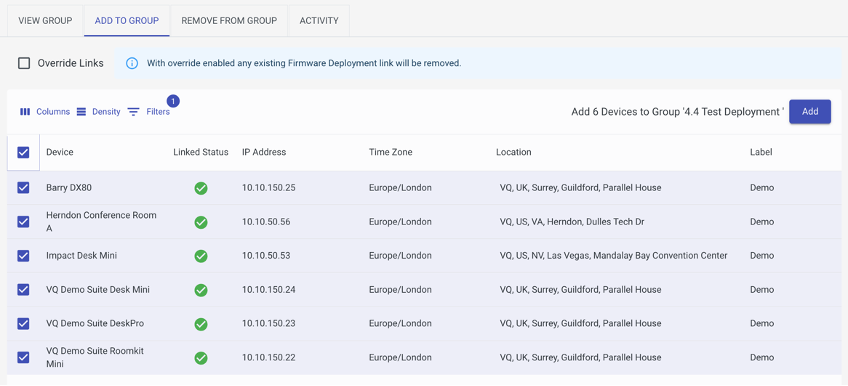
The Add to Group tab will be opened and you can start filtering the devices list to build your list of target devices:
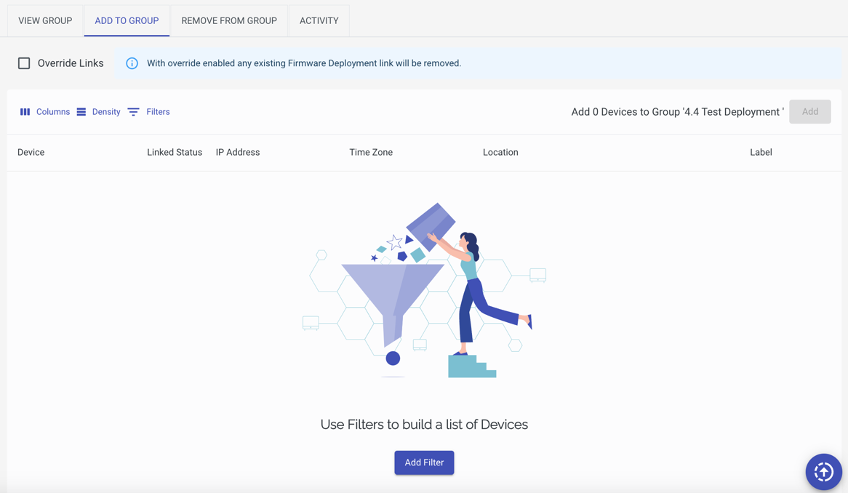
NOTE: Checking the Override Links remove any existing (e.g., previous version deployments) that the device might have been included in.
Once the group has been populated click the Add button and the deployment is now ready to run:
NOTE: Devices can be added to a deployment during the first ten minutes of the deployment window. This is primarily designed to allow a window to be set to ‘now’ but allow enough time to add devices to the group. This might be used when performing a test upgrade on lab devices that don’t require change control and should happen immediately.
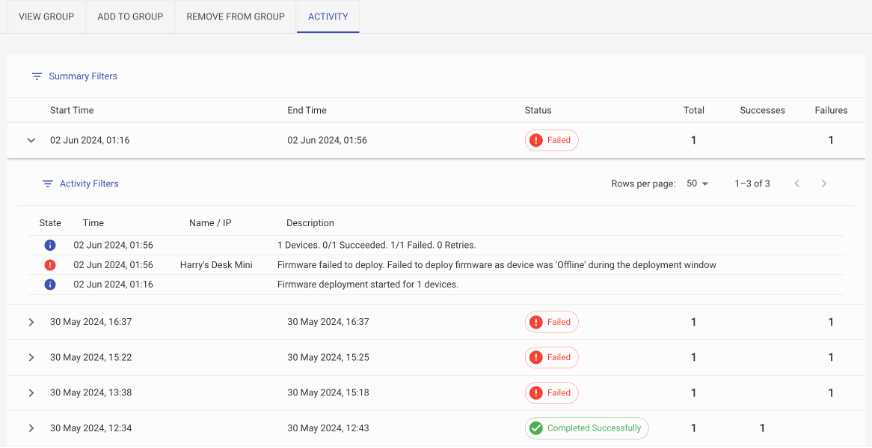
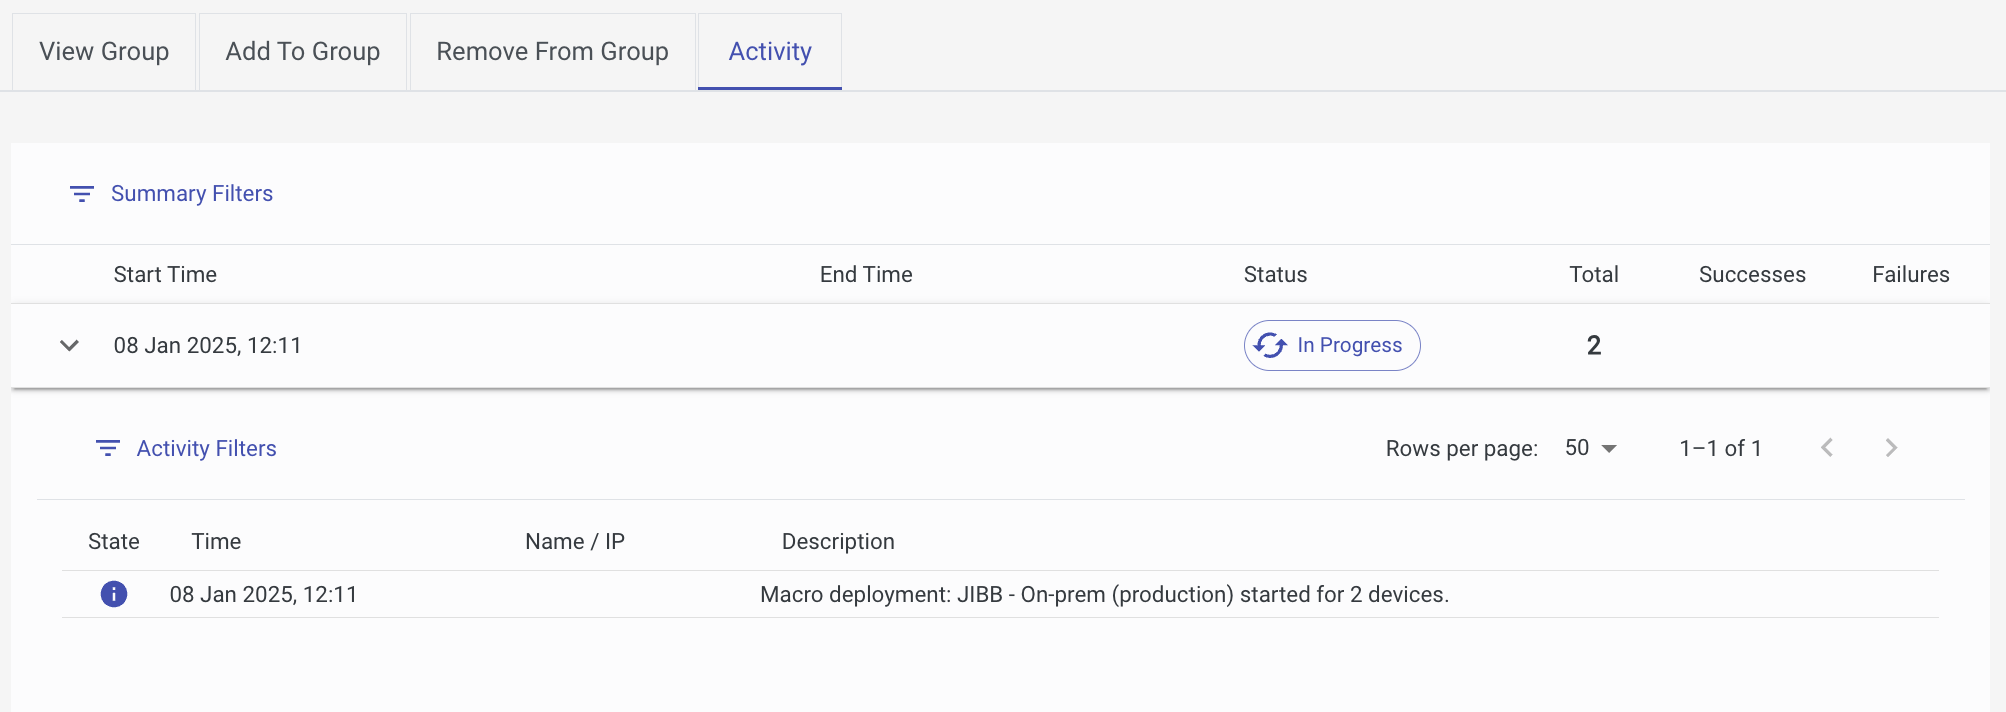
The Activity tab can be used to view past or in progress deployments and provides the user with detailed information about the deployment and any issues that might need addressing, e.g., devices that were offline during the deployment window that might need to be re-attempted:
NOTE: We cannot provide any recommendations on how many devices should be added to a group during deployment windows. Windows will vary and upgrade times for devices can vary by device and are subject to network performance during image uploads to the device.
Macro Management
DMA Macro Management is designed to enable the uploading, storing, and deploying of third-party and self-built macros (sometimes called automation or applications) to Cisco Collaboration devices. Without DMA, these macros must be deployed individually to each device using the local Web interface or complex scripting.

The management of macros is divided into two areas: the creation of macro ‘collections’ by uploading the required files and then the deployment of these collections to one or more devices in your environment.
The DMA File Library is used to upload macro files to the VQCM file server macros content store. This specific store is used so that the Macro Collections and Macro Deployment functions of DMA can manage the macros and associated operations and workflows.

To upload new macro files File Library to…

File upload will open…

Select ‘Device Macros’ and drag and drop file or click the container to select the file to be uploaded…

Name the file, provide a description and notes if required, and check the ‘Make File public’ box to make it visible to other users. Next, select the File Destination for the macro if you do not want it uploaded to the default location on the File Server.
NOTE: to create a folder structure in the Macro store use File Server to navigate to the store and create your preferred file structure:

In this example, the user has chosen to upload the file in a folder structure created to store the multiple versions of the macro (application) that can be used in their environment.

Macro Collections
To perform macro deployment, you must first create a macro collection. Macro collections combine the code files and actions required to deploy and activate macros on collaboration devices.

NOTE: Macros can vary in complexity, but the basic configuration required for collaboration devices to run macros is the same. In this example, we will show how to enable/configure a device for macros and deploy a complex macro:

To create a new collection, click the ‘Add New’  button at the top of the page, and the Create New Collection page will open:

To begin, give the collection a name and description in the Settings section…

Next, start adding files or template modules to the collection by selecting the file type to be added and then selecting from the drop-down list:

NOTE: In addition to loading files to a device for a macro you may need to perform additional configuration changes or feature launches on the target device for it to work. To do this you should create a template module[s] to execute the relevant xAPI commands in the Configuration Management section of DMA.

If the macro requires the device to be rebooted to load correctly (the macro creator should advise if this is required), the Reboot Devices after Deployment check box should be ticked.

In this example, we will also add a template module to the collection to ensure that the target devices of any deployment have been enabled for macro use and have other required services (e.g., Web Engine) running before the macro is activated.

Once the collection is complete, you will see all the files and actions (template modules) listed at the bottom of the page.

In this example, you will notice that the Macro Load Ready template module is at the end of the list and that no activation has been set for the macro files. This can be corrected using the Move up & Move Down action buttons or by dragging and dropping an item, and the Activate check box.

The template module is now at the start of the sequence to ensure that the target device(s) are ready to load and run macros, and the macro file JIBB file 1 – UI has been set to activate on load.

The collection can now be saved  and is ready to be deployed to devices and can be edited further or deleted if required.

NOTE: It is possible to deploy multiple macros using a single collection, depending of course on any additional templates or reboots that might be required. We recommend starting with a collection per macro/application initially and once confident consolidating into fewer collections.
Macro Deployments
Macros are loaded to target devices using the Macro Deployments function. This function enables the user to create a deployment of a specified macro collection to a group of target devices during a specified deployment/change window.

NOTE: Deployment windows are used here as many macros require a reboot of the target system, and this could result in service disruption if not performed outside of operating hours.
To create a new deployment, select Macro Deployments from the main sidebar menu and the Macro Deployments page will open.

To create a new deployment, click the ‘Add New’  button at the top of the page, and the Create Macro Deployment page will open. The deployment can be named and given a detailed description.

To deploy macros to devices that are showing as online with issues you must check the ‘Force Deployment’ box.

Click ‘Next: Devices’  button to move on to the next stage of the creation workflow. The Devices selection page is a standard DMA device group selection operation.

Use the filters operation to build a list of devices and select them using the check boxes.

Having selected your target devices, Click the ‘Next: Schedule’  button to save the list and move to the final stage in the workflow.

The scheduling of macro deployments follows the standard DMA pattern for change window-controlled deployments.

Select the desired change window using the date/time selector and click ‘Finish’  to save the deployment and submit it to the DMA job queue.
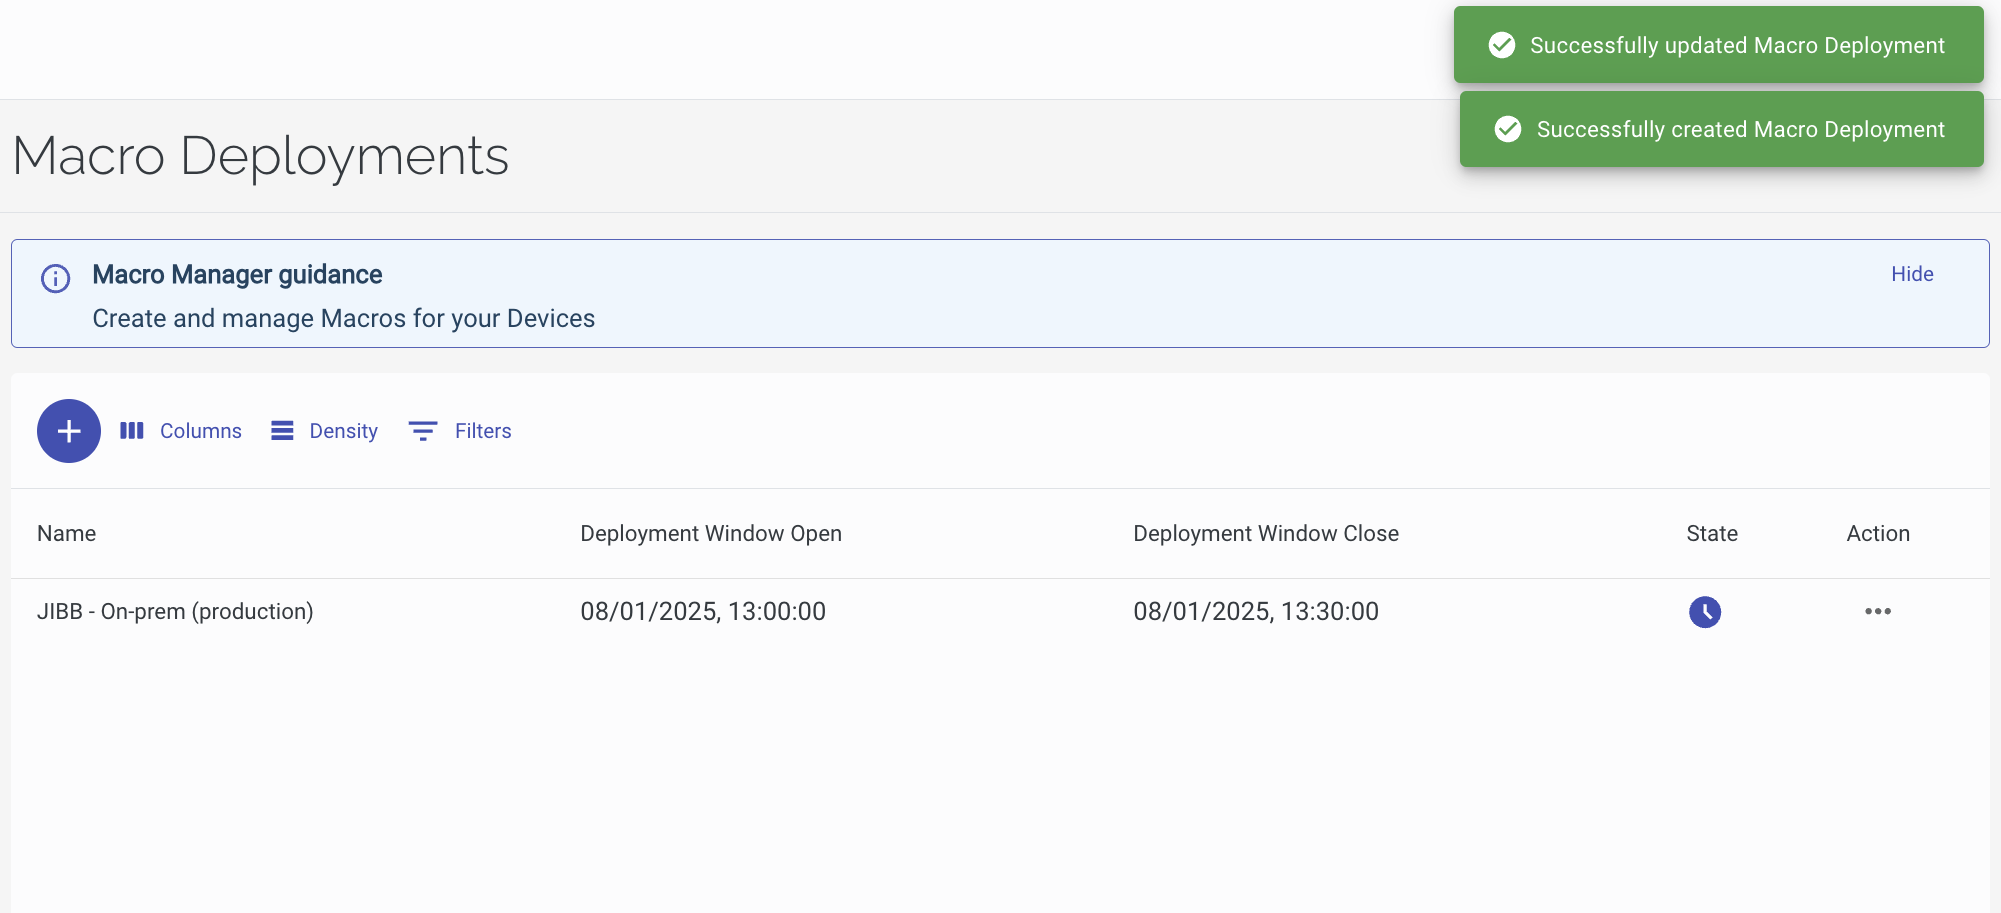
As with all DMA deployment jobs, it can be edited and deleted up until the window specified.
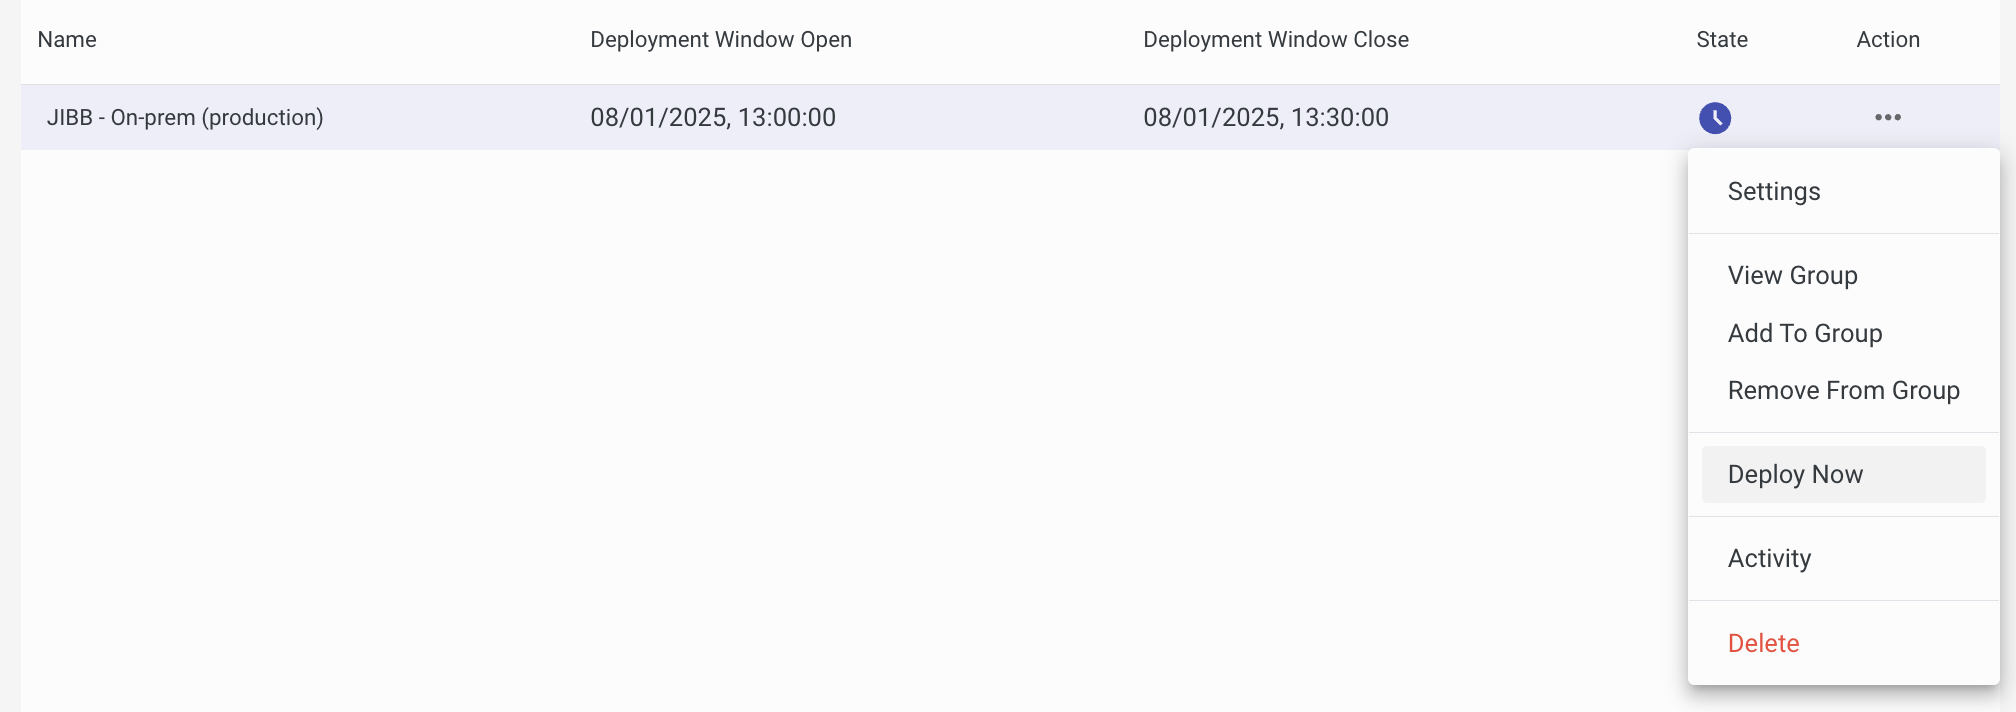
It can be run immediately using the Deploy Now action and monitored via the Activity tab.
Applications
File Server
DMA File Server is a content storage/filing and web server built-in to the VQ Conference Manager ‘cloud-in-a-box’ platform.
File Server acts as the store for VQ Conference Manager functions such as Firmware Management and VQ branding and end user applications updates (e.g., Metro Plug-in), as well as Cisco CMS and device features (branding and macros) and customer created files (manuals, guides and utilities) or content.
File Server has dedicated ‘Stores’ for defined functions and customer content:
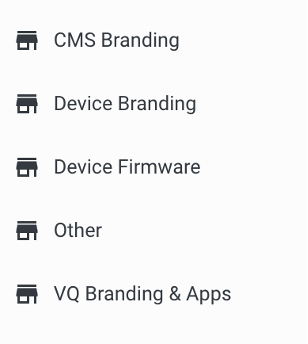
To access File Server, click on the side bar menu item in Applications:
A new tab will be opened in your browser displaying the File Server application:
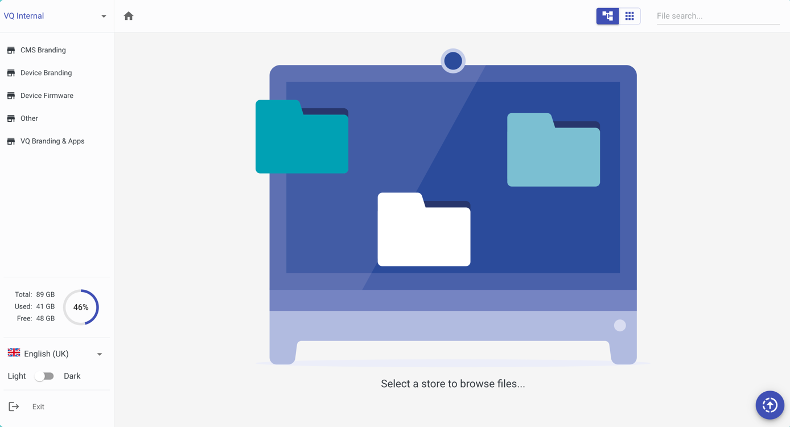
To start using File Server select the store that you want to upload files to, e.g., Device Firmware. The store ‘root’ folder will be displayed:

In the above example a sub folder ‘On-prem RoomOS’ has previously been created, if we expand it  , we will see the folders and files that have been created in/uploaded to it:

To add a new sub folder, click on the New Folder button  :
:
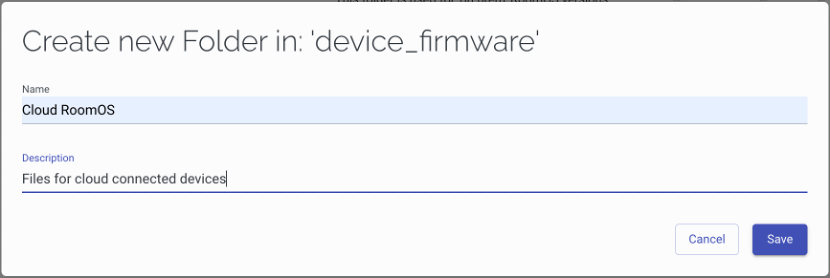
Give the folder a name and [optional] a description of what the folder will be used for. Click Save and you will be returned to the root folder display page and can now begin uploading files.
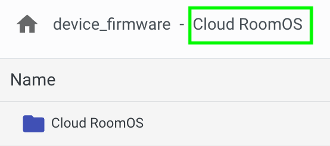
Click on the new folder and the folder indicator will show that you are now working in that folder:
To upload a file(s) to the folder click the New File button  :
:
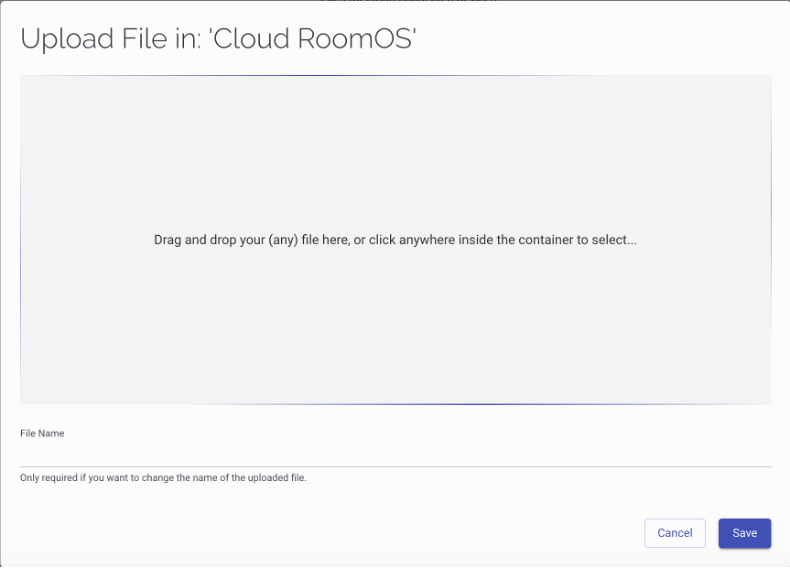
The file uploader will open, and you can either click on the grey box to select the file(s) to be uploaded, or you can drag and drop them from the file viewer or the device:
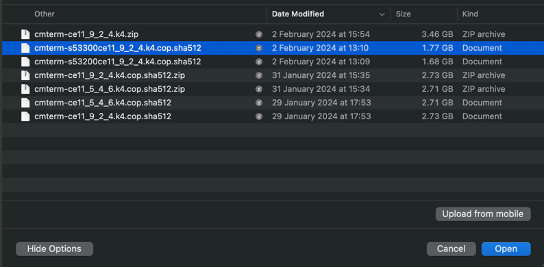
Select the file to be uploaded and click the confirmation button of the file viewer and you will be returned to the file uploader:
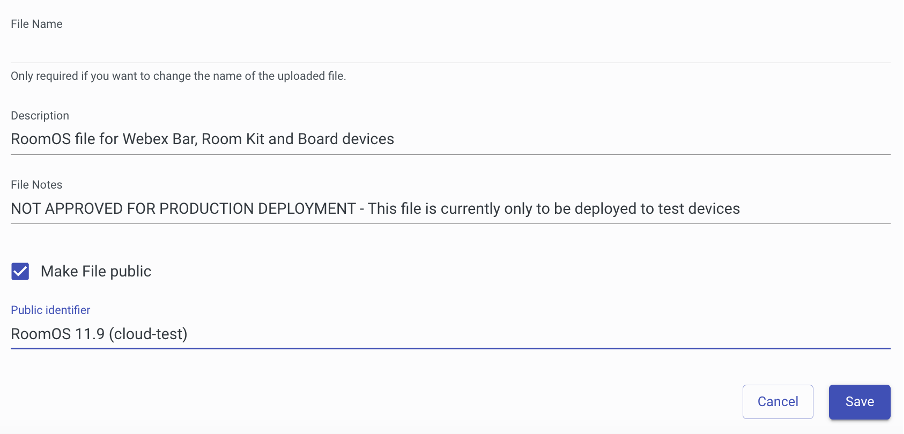
Scroll down the file loader and fill in the remaining fields. File Name (optional) can be used to change the name of the file if desired. Description and File Notes should be used to provide guidance on the use of the file.
If the file is to be made available to all permissioned users of Files Server (and in this case the Firmware Deployment tool), select the Make File public check box:

Click on the Save button and the upload process will begin:
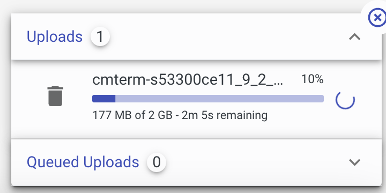
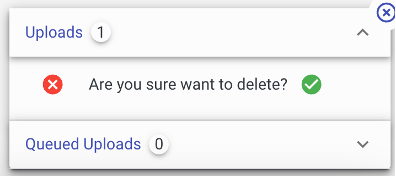
If you want to stop the upload at any point, click the Delete icon ( ) and the uploader will offer the option to stop the upload or continue:
Once the upload is complete a pop-up will display in the top right hand corner of the browser page:

It is possible to continue working in File Server while an upload is running, the uploader remains visible displaying status in the bottom left corner of the page:
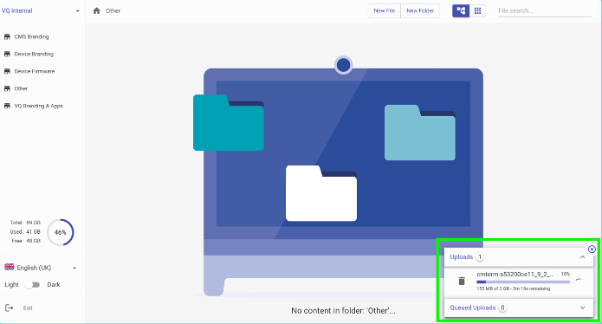
NOTE: For details of the File Server disk space sizing and limits or disk space expansion, please refer to the upgrade documentation.
Switching and launching other VQCM modules
DMA runs as a separate ‘module’ on VQCM to Meeting Scheduling & Management and Analytics (Kibana) and in many cases we expect the users to be different from those using the other modules.
For users who do use the other modules DMA has side-bar menu options for the user to launch them:

Over time this menu may also list other applications that can be launched from within DMA.
Tenants
DMA is designed to work within the existing VQCM/CMS Tenant model, meaning that for every Tenant there is in effect a DMA ‘instance’.
What this means is that Devices, Data Sources and Address Books are created ‘per Tenant’, they can only be accessed by users with permissions on that tenant and the data cannot be seen/used within another tenant.
The Service Account mentioned earlier in this guide is also specific to the Tenant, again meaning that the security model is maintained at all levels.
To create the Service Account
Log in to DMA (make sure your user has access to the Tenant) and click on the “Tenants” menu item at the bottom of the main menu bar:
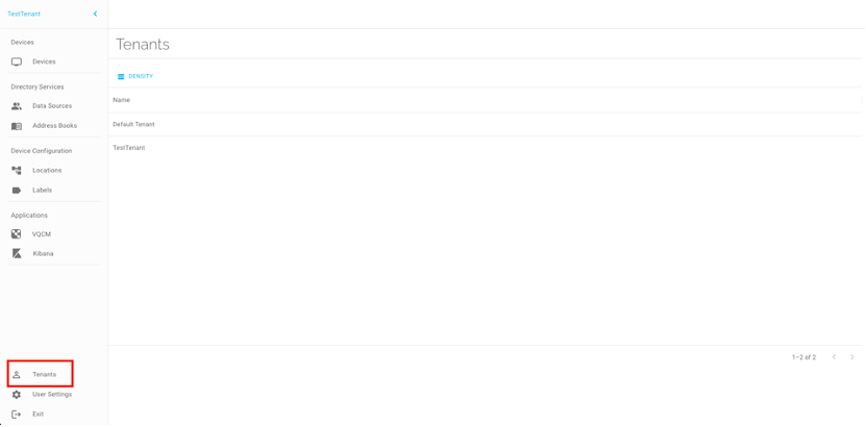
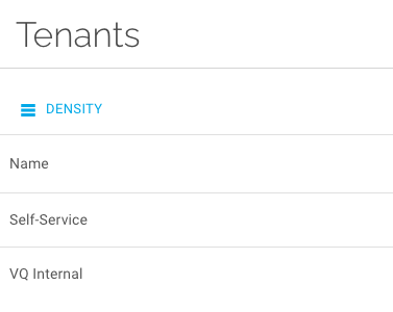
You will be presented with a page listing the Tenants on the VQCM server that you are permissioned to access. Select the Tenant that you want to set up the Service Account for:
The resulting page has only two fields, Username (for the Service Account) and Password. Enter the Service Account name that you want VQ to use to communicate with endpoints and the password it will have:

NOTE: Please ensure that you use a suitably ‘strong’ password that conforms to any organization security policies. If you rotate passwords on a defined schedule, then this is where it should be updated, REMEMBERING that endpoints must also be updated with the new password.
Additional DMA Tenant information
The main side-bar menu item allows a user to switch betweenTenants that they have been permissioned for. This feature is designed to support environments where some users of DMA are responsible for the devices of more than one Tenant:

The current Tenant is displayed in the top left of the DMA page and can be used to switch between permissioned Tenants:

User Settings
The User Settings main side-bar menu give the user access to their personal configuration settings for DMA. These currently include Language selection and Dark Mode.


This area of DMA is where we will provide other accessibility features and settings over time.
